How to manage your table widget data (edit, delete, insert, and upload images)
This article shows you the steps of making your own data management system with simple text uploads and images by using table widgets.
Preparation
Create data source
First, you need to make an internal data source where you will store all your uploaded information.

In the pop-up window that comes up, you can set the name of the table and if the data source will be custom or table we will need the table option.
After that, we can set up our data fields.

Create your API key and webhook actions
*Read more about your API Key and Webhook action. *
These are the types of webhooks we will need to make for the content there is one more but that will be created later inside the editor.

Create the Content
The pages below are those that you will need to make. This tutorial will go through all of them one by one.
Other than the Main everything goes in the other pages section.
- Main: That will be on the default page here we can jump to the other pages and view our data in a table widget.
- Add: Here we will add to the data source
- Delete: On this page, we can delete an entry from the data source
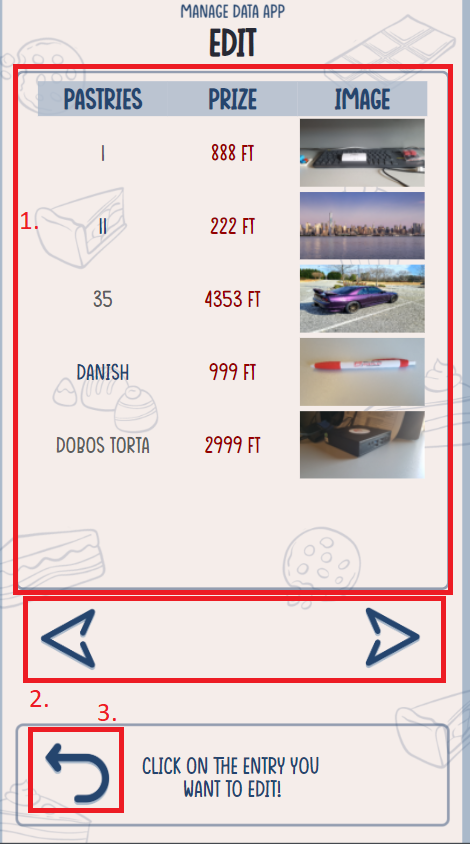
- Edit: Here we can choose the entry we want to edit
- Editor: This is the page where we will make changes to the entry and update the data source
Create the Main
Here we can see the main page we will go through all of the widgets and how to set up them by numbers
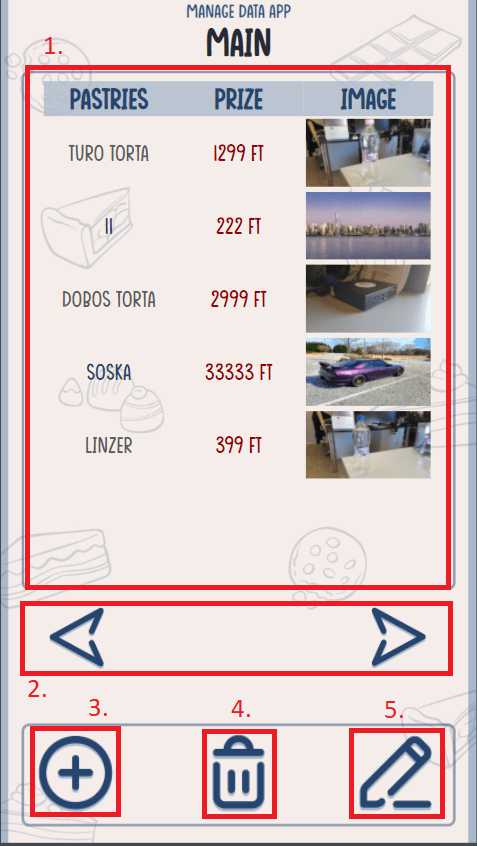
Widget 1 (Table Widget)
Learn more about table widgets.
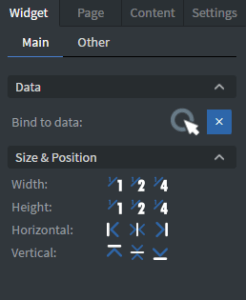
Put down a table widget and click on it -> Main -> Bind to data
These are the values we need to set up for our table:
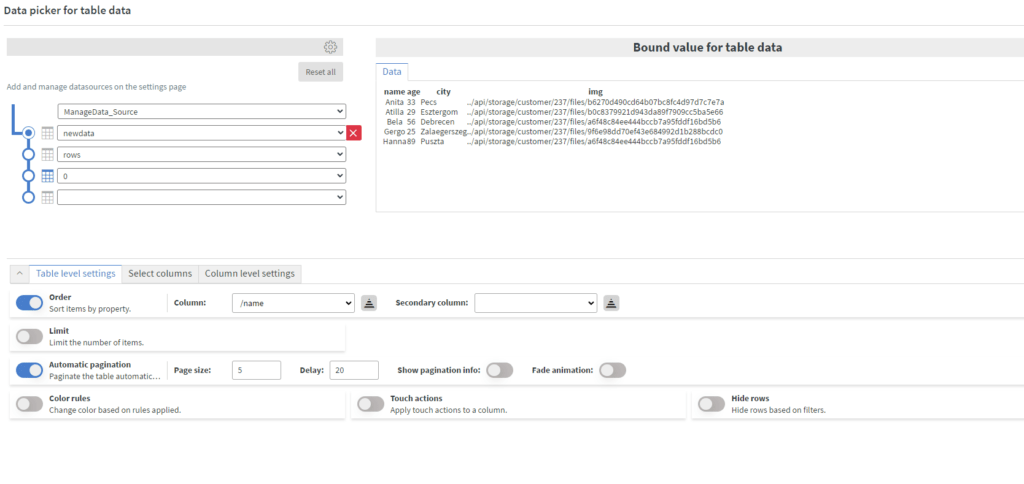
Don't forget to set the type where we will have our images! Select Column.

Widgets 2 (Image Widgets)
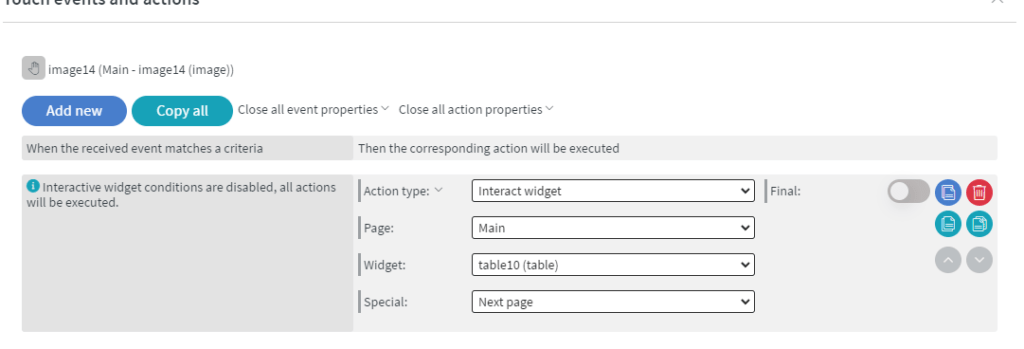
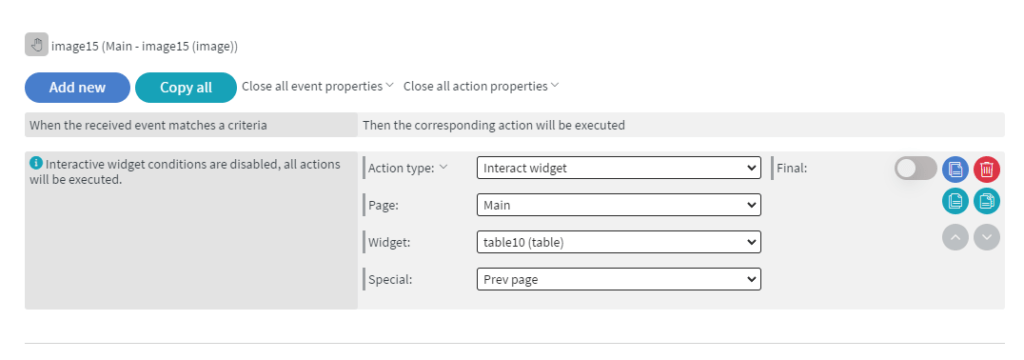
Learn more about image widgets. We use these to turn pages on our table.
Click on image -> Other -> Edit Touch Events. This is the first image that takes you to the next page.
This is the second image that takes you to the previous page.
Widget 3 (Image Widget)
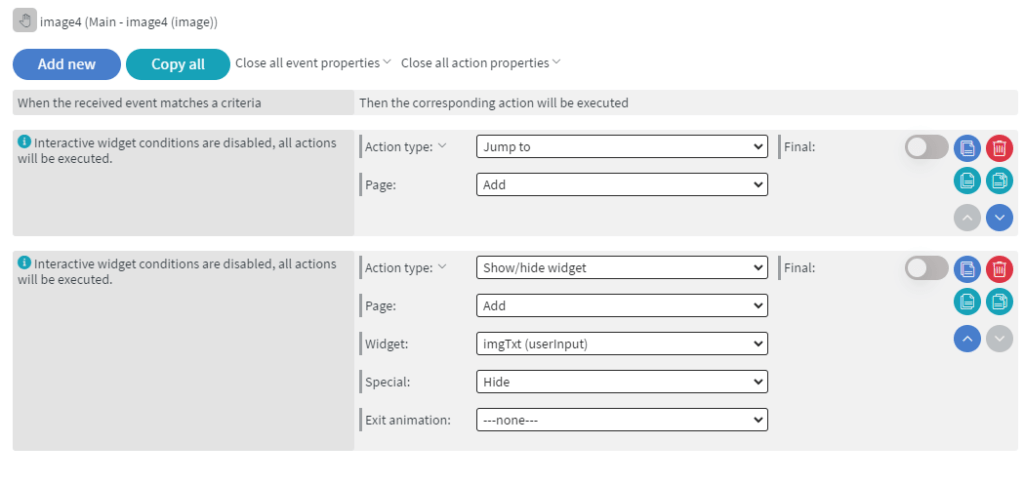
This takes you to the add page (we will also need to hide an input widget later when we have it on the add page).
Click on image -> Other -> Edit Touch Events
Widgets 4 and 5 (Image Widget)
These widgets do the same 4 takes you to the delete page 5 takes you to the edit page.
Click on image -> Other -> Edit Touch Events


Create the Add
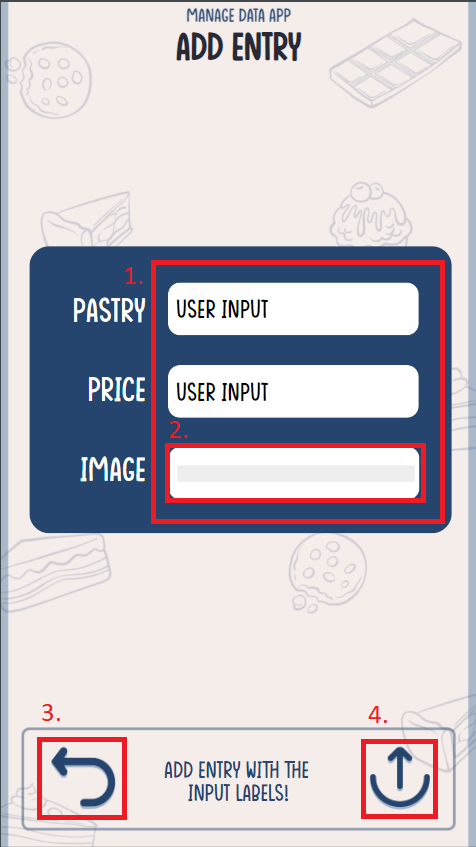
Here we can see the add page we will go through all of the widgets and how to set up them by numbers
Widgets 1 (Input Widgets)
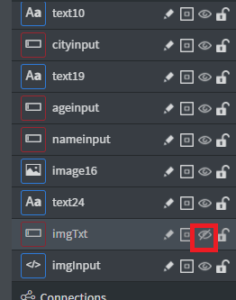
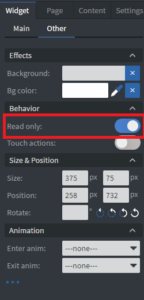
Learn more about image widgets. We will use these to get entries from the user except the last one next to the image text that one will be set to read-only need to be hidden.
Layers -> Hide icon
Click on input -> Other -> Read-Only
Widget 2 (Custom Script)
This Custom Script will handle our image upload (it will call our Upload File webhook).
The Script has 3 parts:
- loadImage: this will load or image from our input
- resizeImage: that is going to handle the resizing of our image
- sendImage: here we will upload our image using our webhook
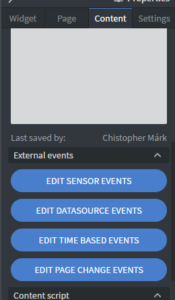
After we finished our Custom Script we need to set a Sensor Event to the page.
Content -> Edit Sensor Events
Here we need to set page-wide events first we have to overwrite the value of our image input also we set this input to show on the page.
After that, we hide our custom script.
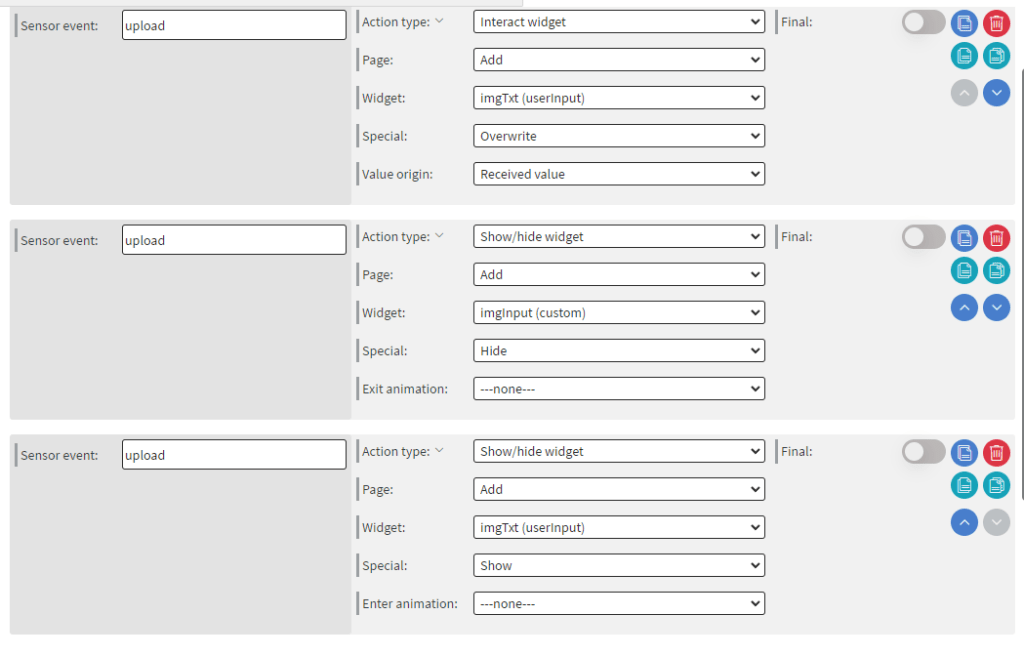
We will use this same widget and method later on the Editor page.
Widget 3 (Image Widget)
We use this to jump back to the Main Page.
Click on image -> Other -> Edit Touch Events

Widget 4 (Image Widget)
This is the widget that handles the upload of all of our entries to the internal data source.
Click on image -> Other -> Edit Touch Events
We add a new Execution Batch.
Here we use the Widget's value option on all of our inputs so we can get their values also we attach our internal data source to a name with the Data Field option.
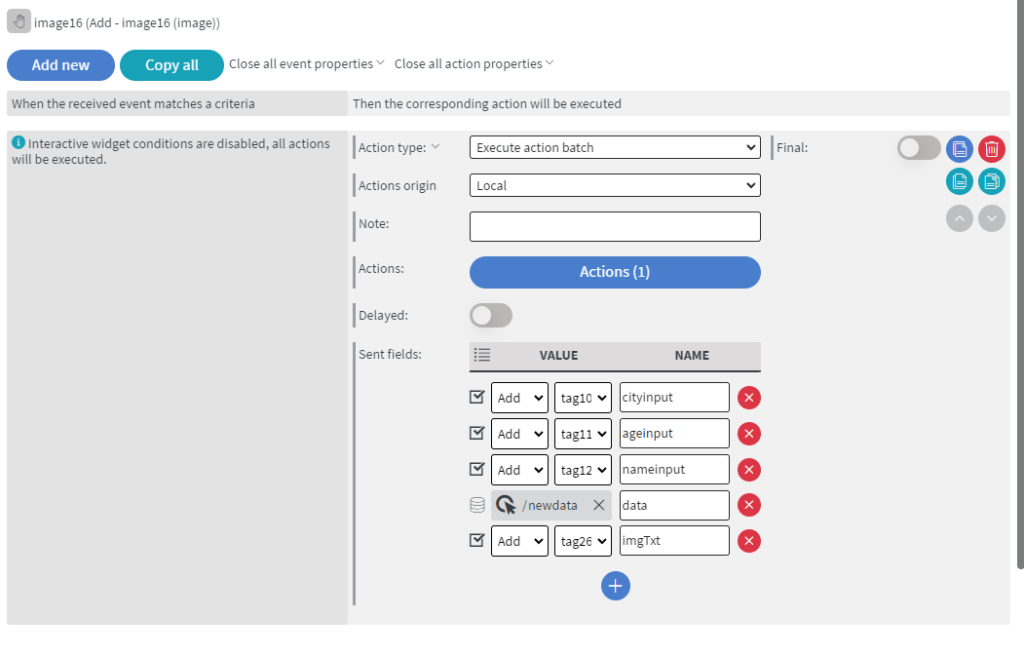
Inside the Actions
We add a new Execution Batch.
Here we add a Call Function where we will add to our existing internal data source also there is a unique id generation in the process as well (You can also learn about this from here).
This will call our Insert to data source array type webhook.
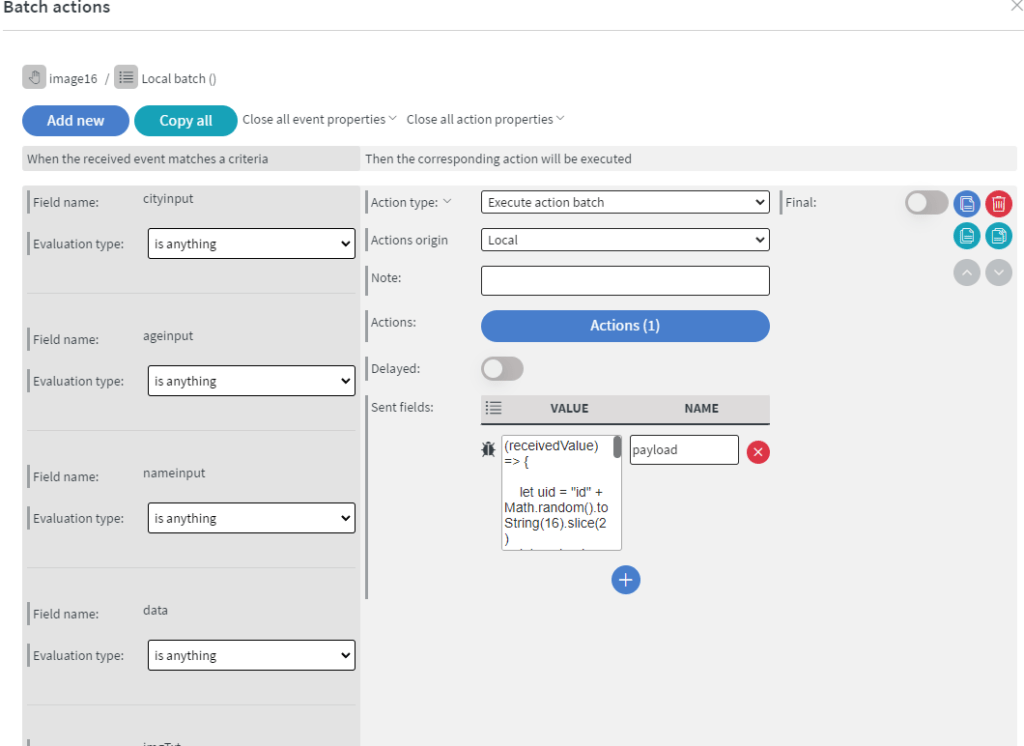
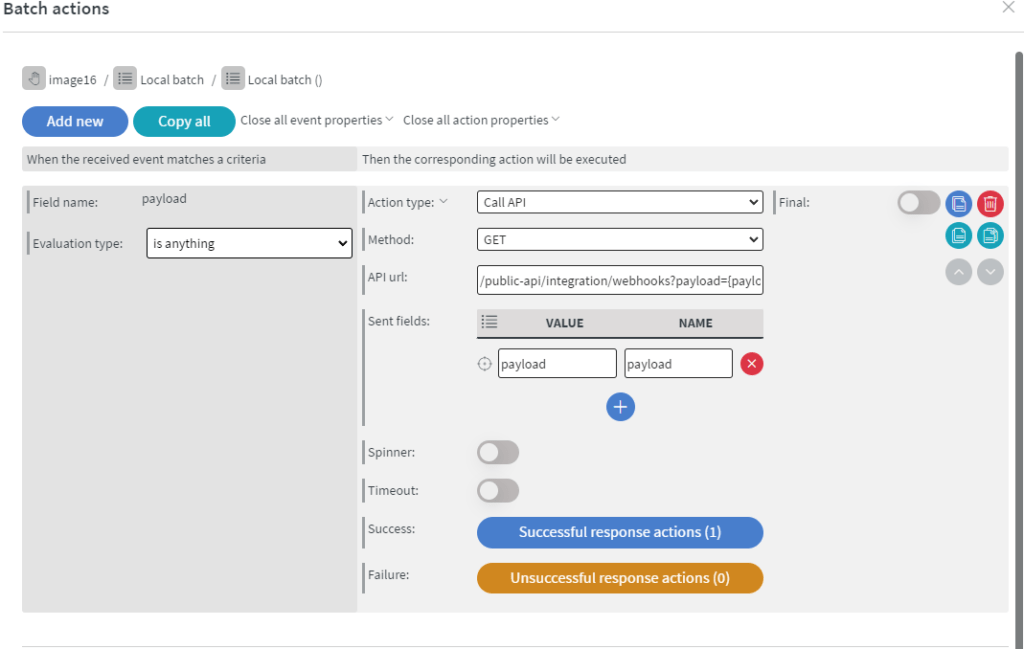
Inside the Actions
We Call API with GET method and this is where we call our webhook.
URL:/public-api/integration/webhooks?payload={payload}&apiKey=We put here the API key that our webhook uses
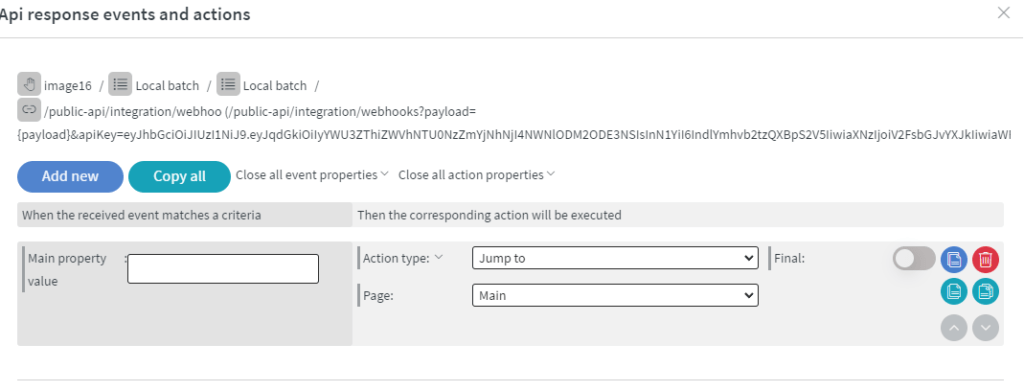
Inside the Succesful Response
We jump to the Main page if our webhook runs successfully.
Create the Delete
On this page, we can delete entries from our internal data source by clicking on them inside the table widget.

Widget 1 (Table Widget)
Click on the table -> Main -> Bind to data
Here we bind the data to the table but only the name, age, and city and set everything to the same as we did before on other tables.
The new option we will add here is a Touch Action this will gave forward the id of the entry that we click on.
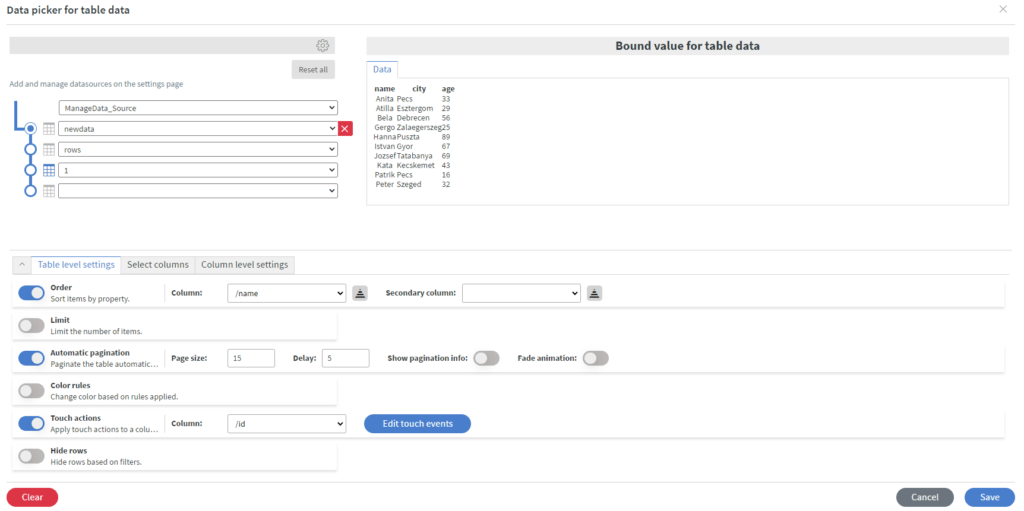
Inside Edit Touch Events
We add a new execution batch and to the sent fields we put a Property of received value and a Data field.
Remember to always use originalData as a name to the Property of received value this is the only way we get our id from the clicked table!
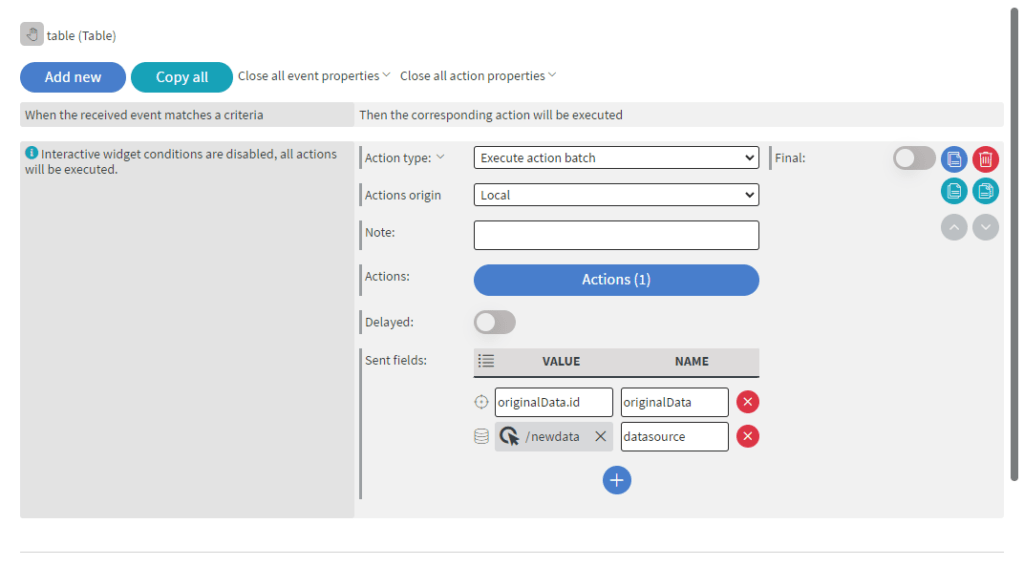
Inside the Actions
Here we add a new execution batch as usual and give it a Call function.
This script will splice our data source where it finds a match to the id and then returns the new data source.
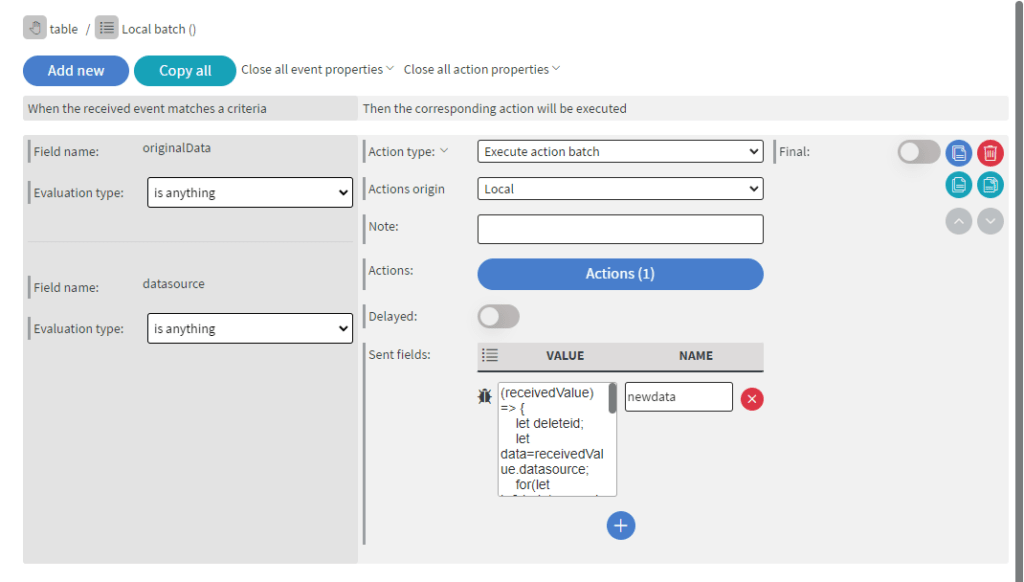
Inside the Actions
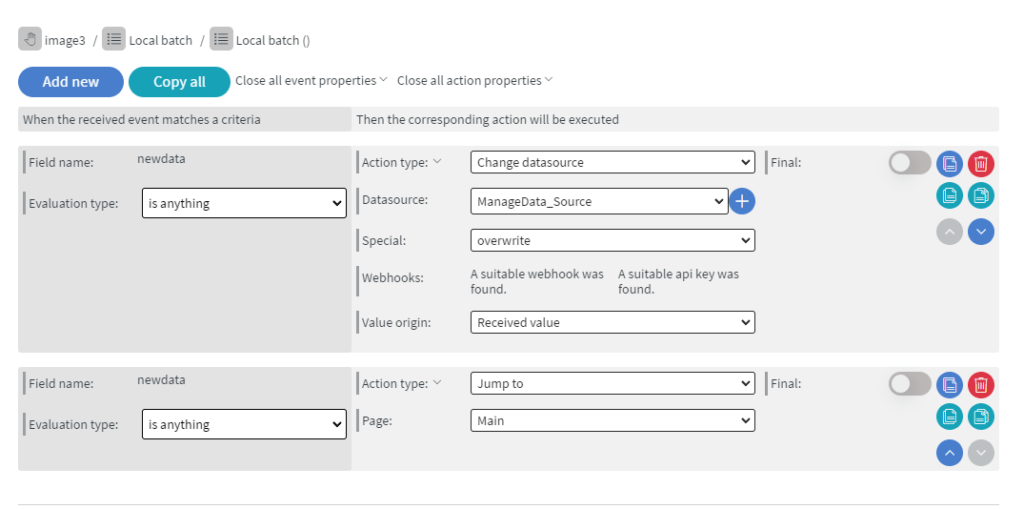
We use Change Datasource which will overwrite our original data source with the new spliced version.
Here the editor can generate us a webhook and an API key.
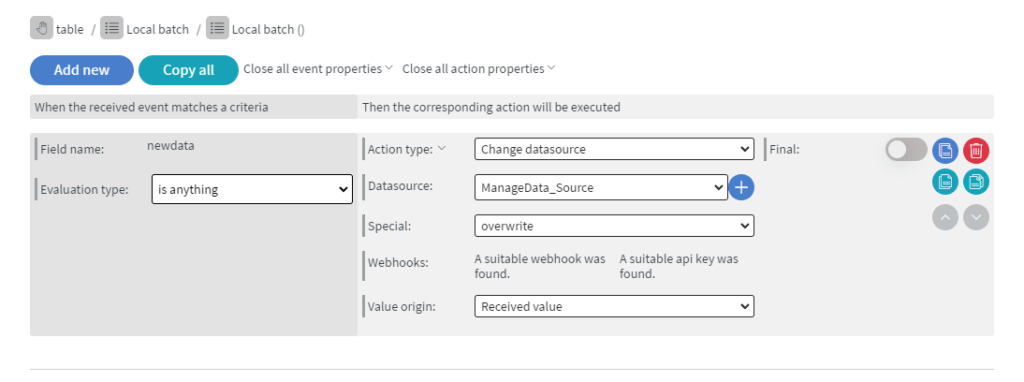
Widgets 2 (Image Widgets)
They do the same as on the main page.
Widget 3 (Image Widget)
This jumps back to the main page.
Create the Edit
On this page, we can choose which entry we want to edit, and then we send it to the editor through the mock data.
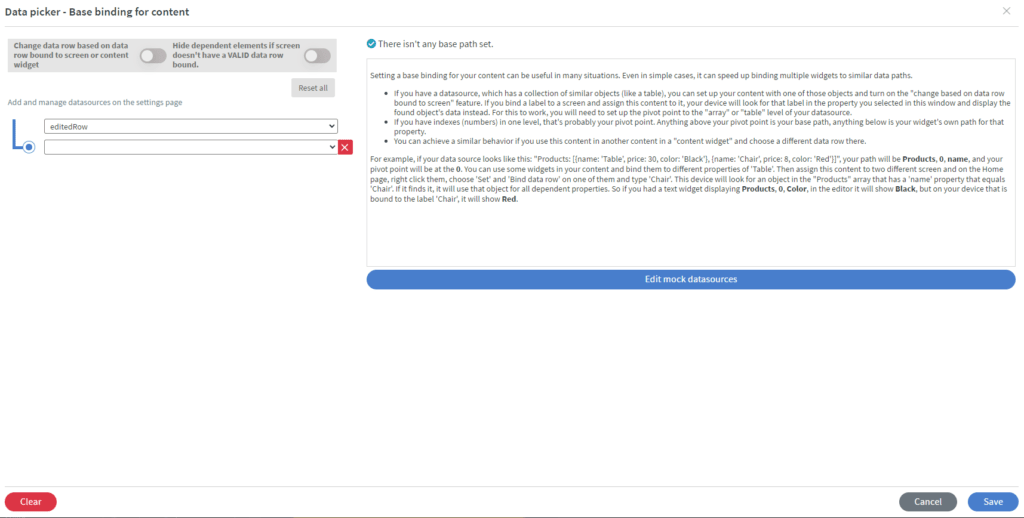
First, we need to make mock data.
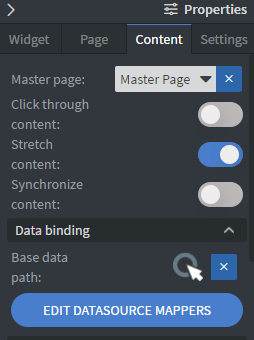
Content -> Base data path
Here we choose Edit mock data sources
Inside the Edit mock data sources page, we add a new mock data and set the following values.
Widget 1 (Table Widget)
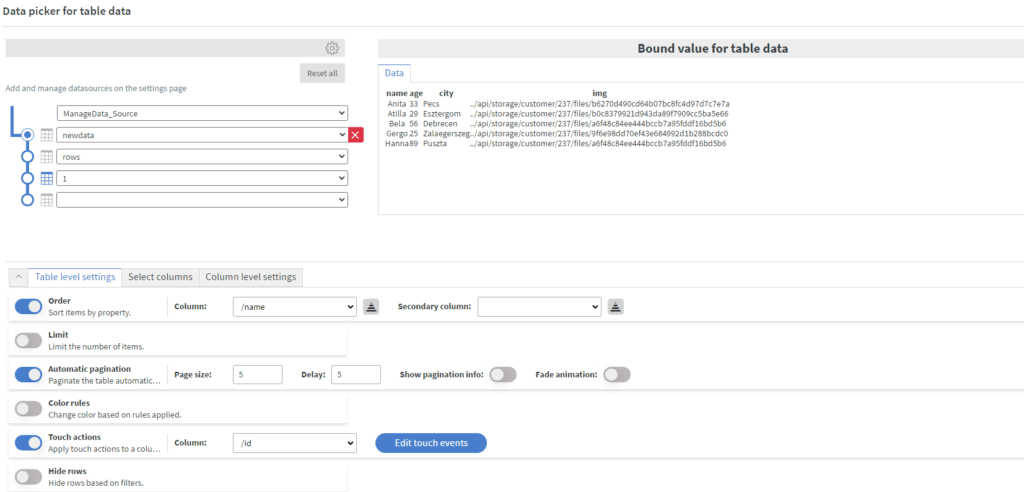
This table will handle our mock data if we click on an entry it will change the value of our mock data to the clicked entry values.
Click on table -> Main -> Edit bind data
Here we will set up the following options and values don't forget to set the IMG column into image type.
Inside the Edit touch Events
First, we have to send the entry values to the mock data to do this we use an Execution Batch and we sent with it a Property of the received value(as usual remember to set it to originalData value and name)
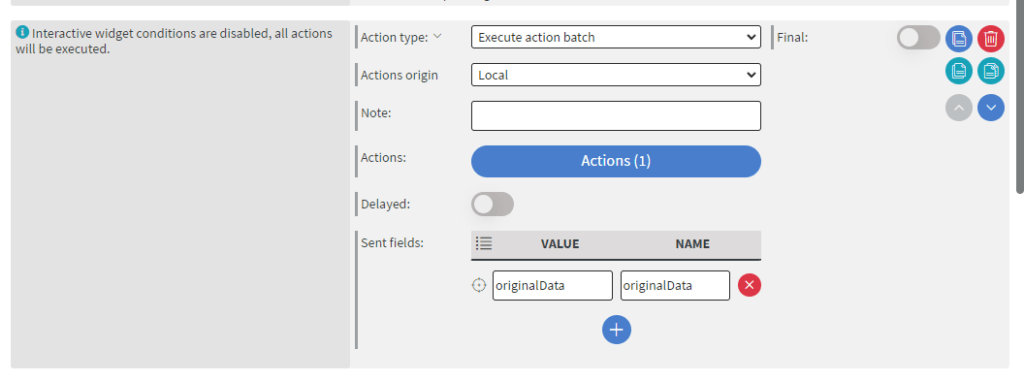
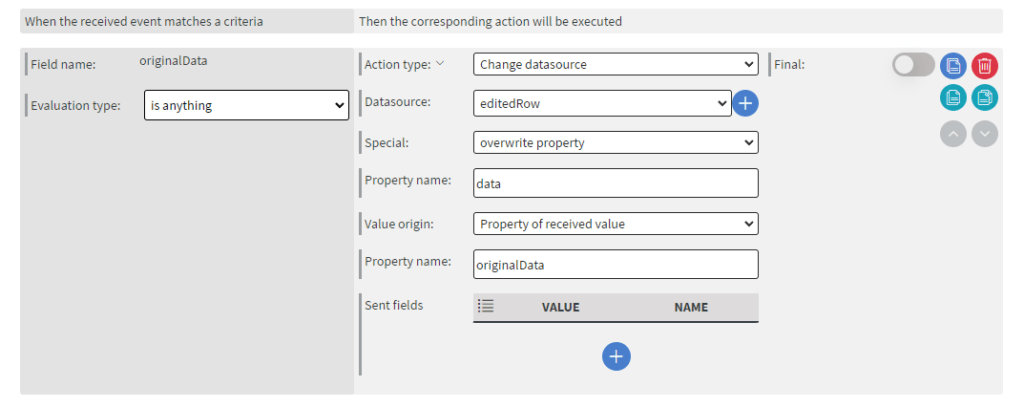
Inside the Actions
Here we choose to Change the data source and we overwrite the property of the mock data source.
The second thing we need to add is to send these clicked entries into the input on the Editor page with an Execution batch.
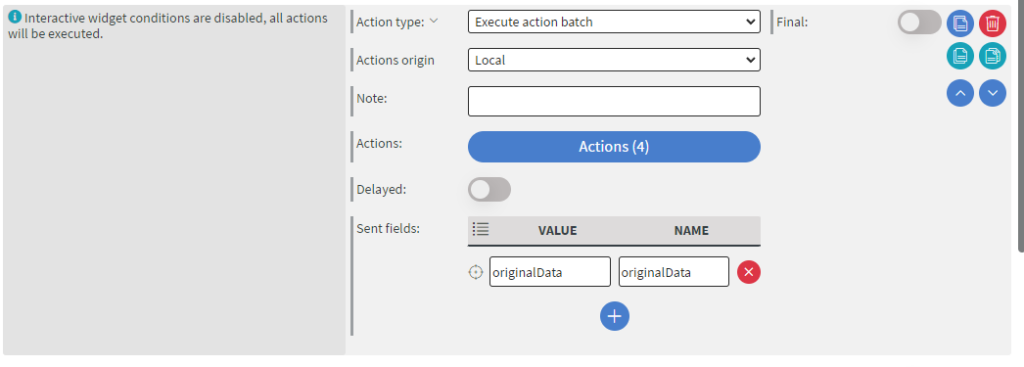
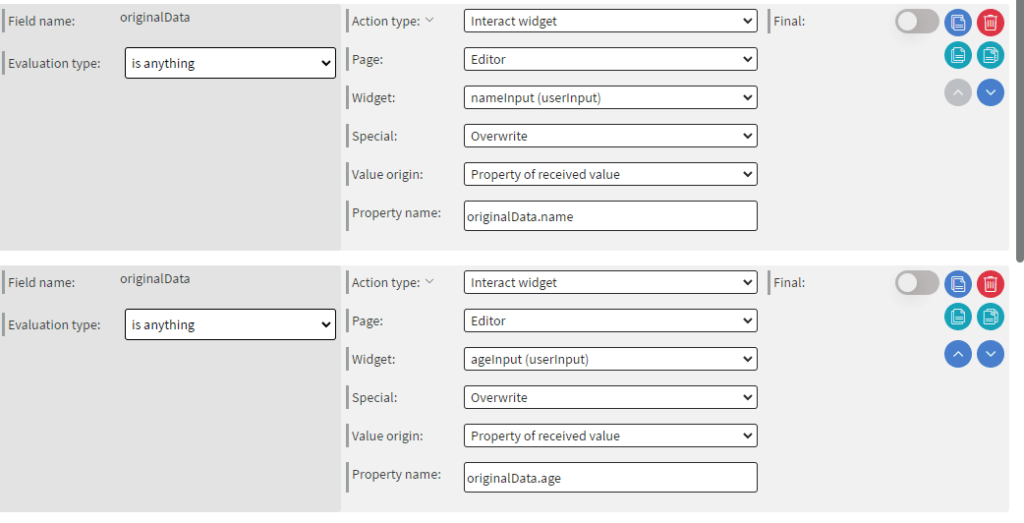
Inside the Actions
Here we overwrite the values of the inputs on the Edit page with their corresponding values using Interact widget actions.
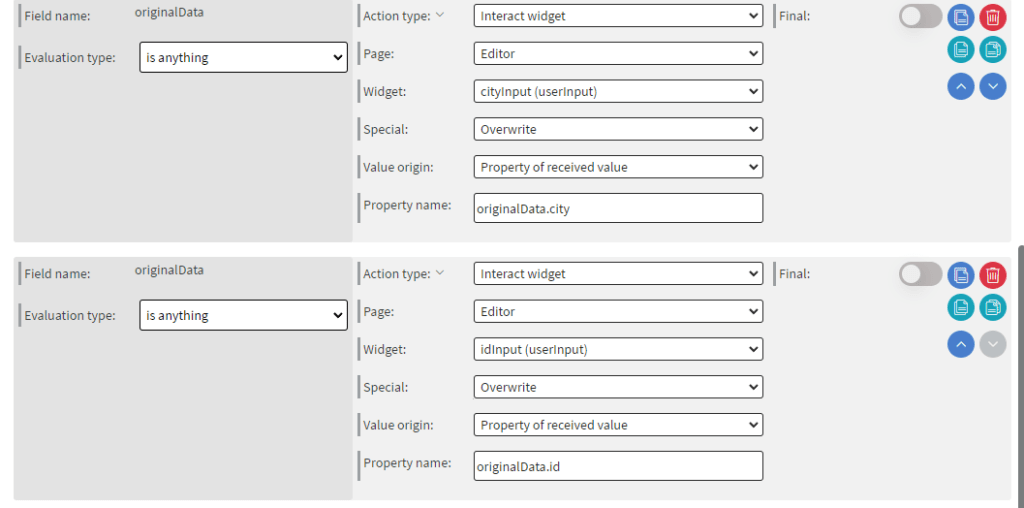
The third and last thing we need to add is a jump to the editor, hide an input on Editor and show the Custom Script.
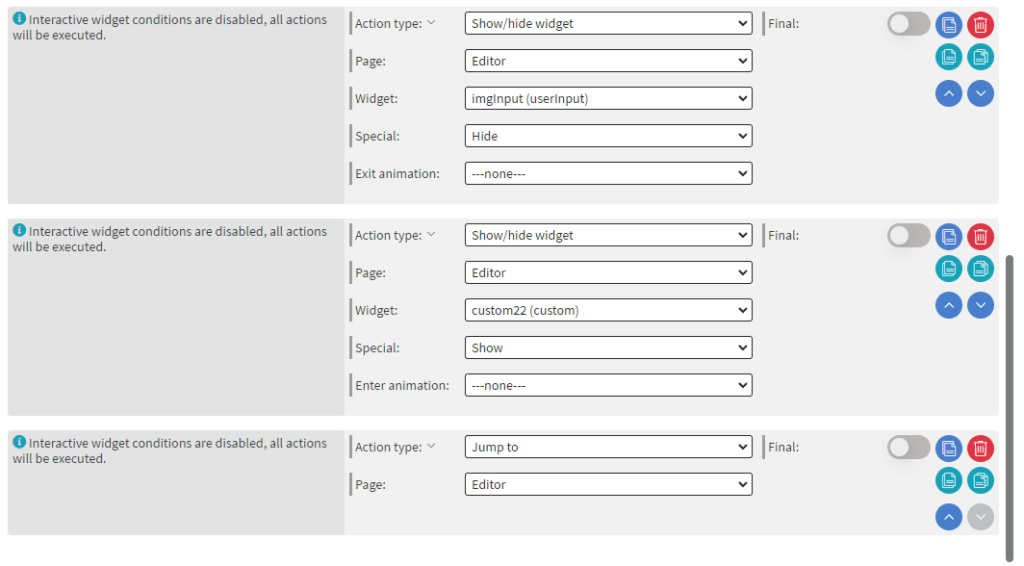
Widgets 2 (Image Widgets)
They do the same as usual changing the page of the table on their page.
Widget3 (Image Widget)
This widget jumps back to the main page.
Create the Editor
This is the page where we will edit and upload our edited data source.
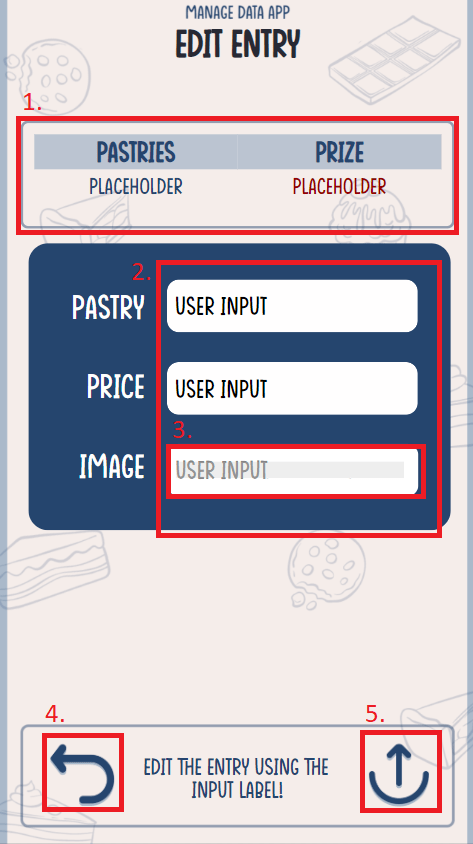
Widget 1 (Table Widget)
This table will show our data from the mock data source which is the entry that we will edit.
Click on Table -> Main -> Bind to data
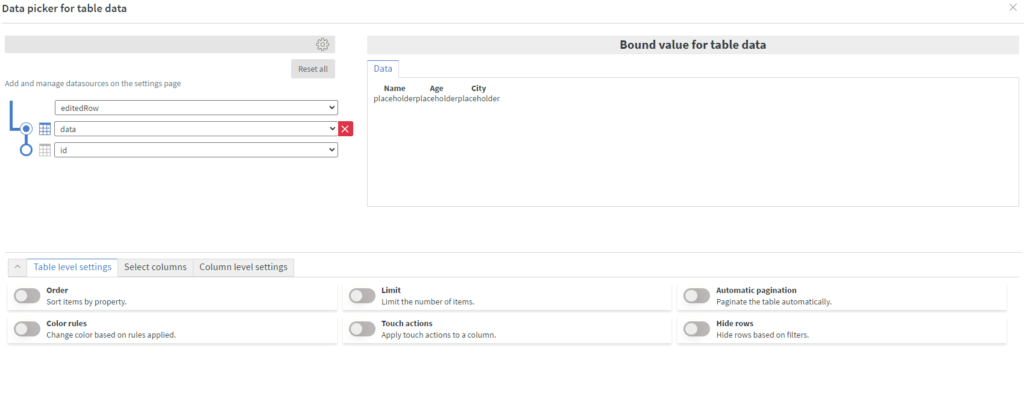
Widgets 2 and 3 (Input Widgets and Custom Script)
These will be the same as they were on the Add Page and also this page has the same type of sensor events as well.
The only difference is that we will have another input for the id but we will hide this from the user.
Widget 4 (Image Widget)
This as usual will jump you to another page this one in particular to the Edit page.
Widget 5 (Image Widget)
This widget's touch event will upload the edited data source to our internal data source.
Click on Image -> Other -> Edit touch events
Here we will add a new Execution batch and send the following values with it.
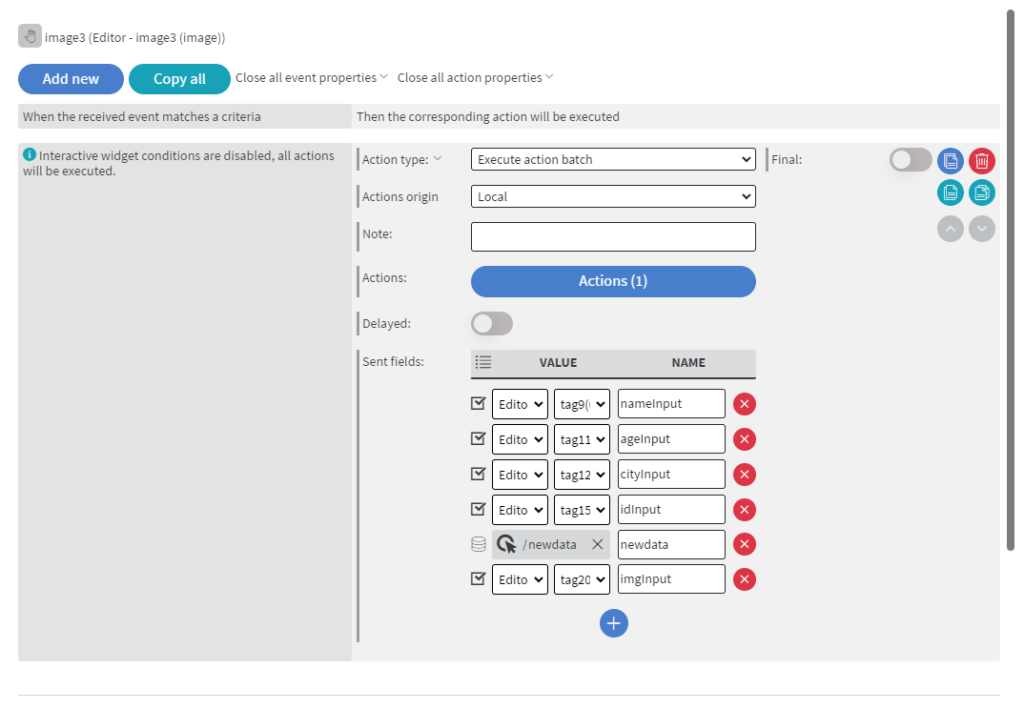
Inside the Actions
Add another Execution batch and we will add to it a Call function.
The script will change the values of the entry which corresponds with our given id and gives back the edited data source.
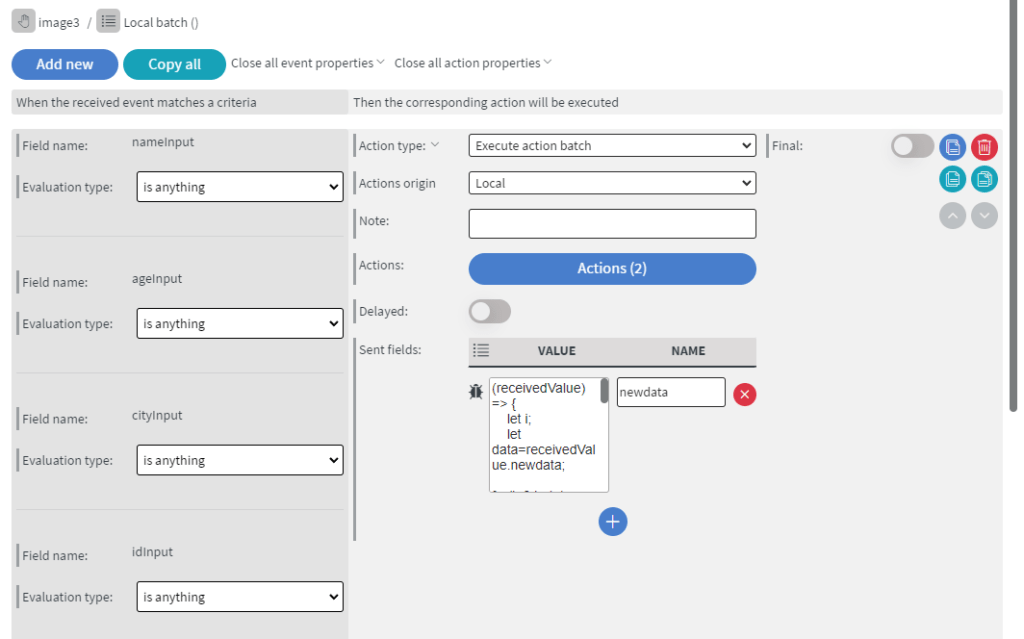
Inside the Actions
We add a Change Datasource and overwrite our original data source with the edited one also we jump back to the edit page.
