User Guide - Desktop Connect for CRM
Starting Desktop Connect for CRM
After a successful installation and configuration of Desktop Connect Server along with applying CRM side customization, the users are ready to use the functionality provided by the application without any client side installation. Solution deployed on CRM side is available from the menu ribbon providing access to the connector for all users, who have the Call Center feature enabled and configured in CRM.
Loading Desktop Connect for CRM
The Geomant Desktop Connect web application establishes a connection to Avaya AES services. Event handling and telephony control requests forwarded to and from the client application are performed by the web server.
Navigate to the Lightning App that has Phone utility bar enabled.
Classic
Navigate to Home on the Salesforce page, where you will find the embedded Desktop Connect application on the left.
The application can be used in Console mode, as well.
Console Mode
- Navigate to the Console from the menu drop-down in the upper right-hand corner.
- After a successful load of the console mode, select Phone from the bottom right-hand corner.
- The application window can be placed wherever within the page. Minimizing the application will place it to the tray. Retrieve it by clicking on the Phone button again.
Agent State Handling
Geomant Desktop Connect allows agents to login, logout and perform Avaya Communication manager supported agent state changes.
Logging In
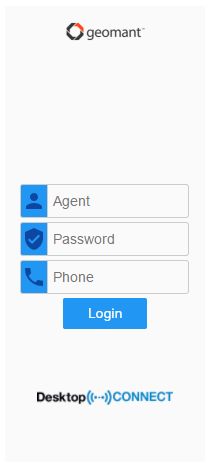
After the application loads, it is necessary to login to the station.
After the application loads, it is necessary to login to the station.
- Page loads successfully.
- A popup will presented requiring you to provide your Salesforce or Microsoft credentials for authorisation
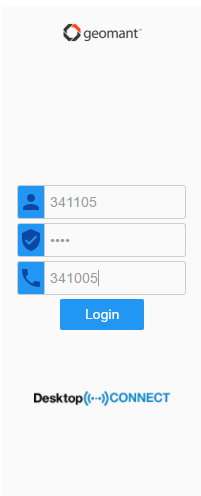
- Provide Avaya login credentials:
- Agent identifier
- Password
- Extension
- Click on Login or hit **Enter.
- If the credentials entered are correct, the user will be logged into the phone equipment and placed to auxiliary state.
Note that if the credentials are not valid, the user will be notified at the bottom of the application with a text message.
Upon a successful login, the session will persist even if the page is refreshed, provided that there is one active CRM session at least.
If the CRM session is closed or the Desktop Connect session is not available for more than 30 seconds, the agent is logged out from the phone equipment.
Once logged in, the agent has access to agent state change, phone control functionalities, click to dial and automatic popup functionalities, as well as entity search results.
Logging Out
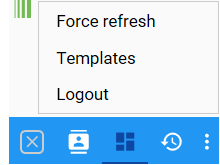
Press the Logout button to logout the current agent.
Please note that the login screen will appear again instead of closing the application. This functionality is unavailable whilst the agent has an active call.
Agent State Change
Geomant Desktop Connect allows agents to change their states. They can switch between the following states:
- available (auto-in, manual-in)
- after call work
- not ready states
Agent states can be renamed. Instructions described in the Agent State Configurations section.
Change to Available State
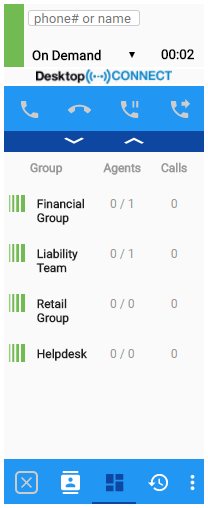
Agents can change to available state manually.
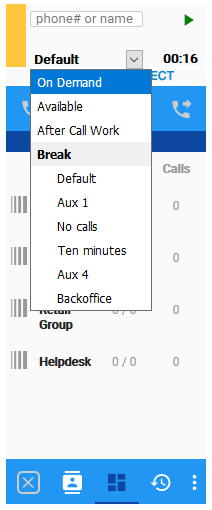
- Use the **agent state drop-down list.
- Click on Auto-in or Manual-in.
- Successful agent state change is displayed on the agent state colour indicator - it changes to green.
Change to After Call Work State (ACW)
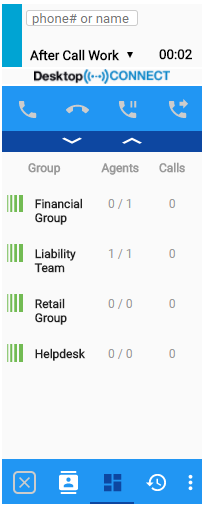
Desktop Connect for CRM allows agents to change to after call work whenever it is necessary. The agents are required to select the ACW state from the state indicator drop down menu in order to transition to telephony wrap-up state.
- Use the agent state drop-down list.
- Click on ACW.
- Successful agent state change is displayed on the agent state colour indicator - it changes to blue.
Change to Auxiliary State (AUX)
The agent state drop-down displays the pre-configured not ready
states.
The application supports one and two digit reason codes – reason code
names are displayed while the numeric value is sent to the switch.
State can be changed to any of the auxiliary codes anytime, but it can also be requested by the agent during an active call, in which case these requests are forwarded to Avaya Communication Manager and are handled as pending requests until the active call is terminated.
Right after login the agent is set to auxiliary state. The colour indicator is yellow.
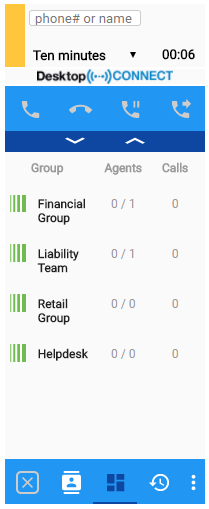
Desktop Connect Dashboard
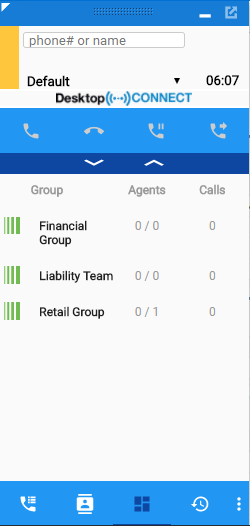
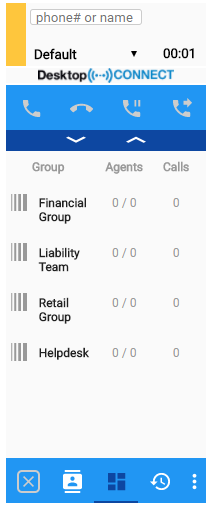
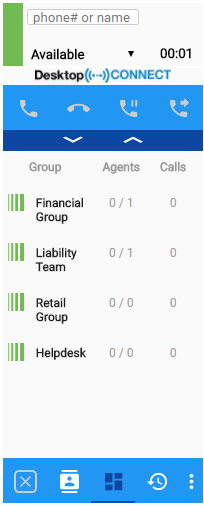
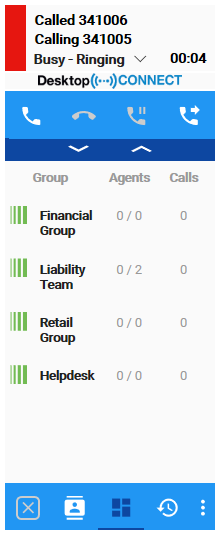
The dashboard contains information on the current state of the call center. It displays the list of associated queues of the related Call Center showing the number of agents currently logged-in and the number of active calls.
The dashboard will be displayed when the agent goes into AUX state and
after login. It is only possible for users logged in with a valid agent
identifier.
However, this view is accessible from other states, as well. Navigate to
the Queue Dashboard Panel view by clicking on its icon.
The Queue Dashboard Panel will be visible if the Wallboard feature has been set previously via the License Management Portal. Read more about applying features on the Allocating Products and Features. article.
Find more information on configuring queues of the dashboard on the following article: Wallboard Configuration - Desktop Connect for Salesforce
Queue Dashboard Panel
The following information is displayed on the Queue Dashboard Panel:
| Groups | The hunt groups registered in the system. |
| Agents | The number of available agents and the total number of agents registered in the specific group. |
| Calls | The number of active calls in the specific queue. |
Buzzeasy Callback Panel
It is possible to schedule a callback from the application via Buzzeasy Callback Services. A new tab is included in Desktop Connect that is used to manage callback requests.
Manual Buzzeasy Schedule**
- Click on the Callback Panel in the Desktop Connect application to schedule a callback.
- Enter the contact name in the Callback name field.
- Enter the customer's phone number to which the callback will be initiated.
- Select the Buzzeasy service queue for the callback. The queues here may have a different name and additional settings (custom routing / agent owned recall) compared to the BE Portal service queues.
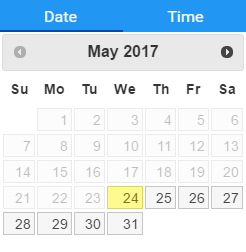
- Choose the date of the callback using the calendar. Here you can pick a single day when the callback is suitable for the customer.
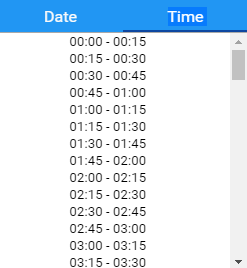
- Choose the preferred time slot that is suitable for the customer. Time slots are set separately for the Service Queues via the Buzzeasy Admin Console.
- Enter any comments in the free text area.
- Click on Save to finish registering of the callback.
Buzzeasy Schedule of an Inbound Call
- Answer the inbound call.
- Click on the Call Result panel to choose the contact who is calling and the related case, if there are any.
- Go to the Buzzeasy tab to schedule a callback.
- Use the Associate button to link the contact and the case to the schedule.
- Follow steps 4-8 described in the Manual Buzzeasy Schedule section above.
Auto-populate Callback Data
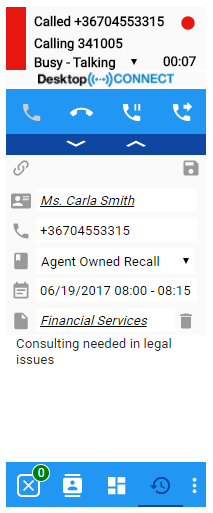
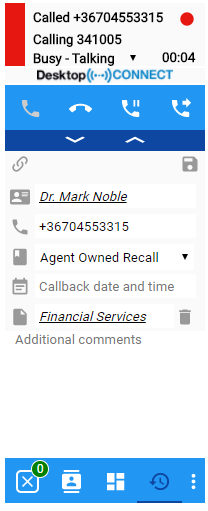
If the customer data exists in the CRM system, the Desktop Connect application will auto-populate a few details on the Callback panel during a phone call.
The following data will be auto-filled:
- Contact card of the customer
- Associated objects of the customer, such as account information
- Comments
No data will be auto-populated during a conference call.
Call Handling
Desktop Connect for CRM provides full 3rd party call control capabilities required for any call center agent by maintaining a synchronized state with the phone set.
Incoming Call
Incoming calls are presented to call center agents on the header of the application.
Agent state is transitioned to Busy automatically.
The following actions are available for the agent once a call is answered:
- Terminate call
- Hold call
- Transfer / Conference call
- Initiate new call

Call Result Panel
Displays search results that match the alerting phone number for given entities:
- Name and title
- Associated objects
The result tab also includes call log options:
- Outcome for the call
- Subject of the call – filled automatically
- Comment for the call
It offers the possibility to create new objects from here using the buttons located in the top of the panel. The following objects can be created:
- Contact
- Account
- Case
- Lead
- Opportunity
Handling a Second Inbound Call
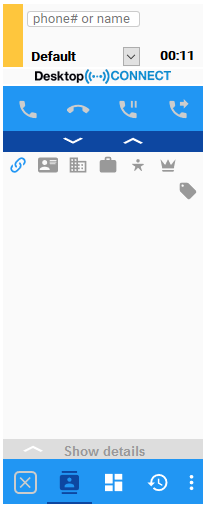
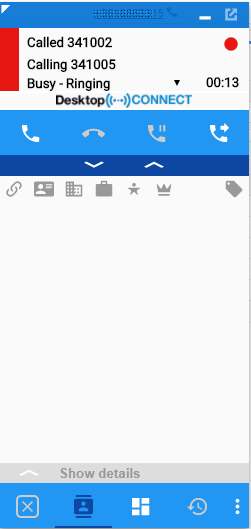
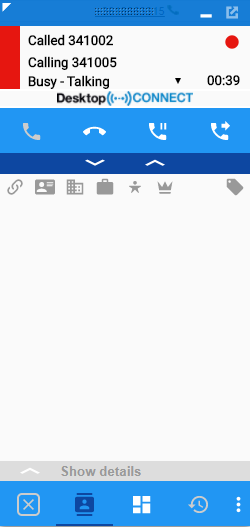
When a second incoming call arrives to the agent who has an active call, the Ringing call will be the active call, so the agent can answer it in a single click. The agent's active call is put to hold when the second call is being presented.
Hold/Resume Call
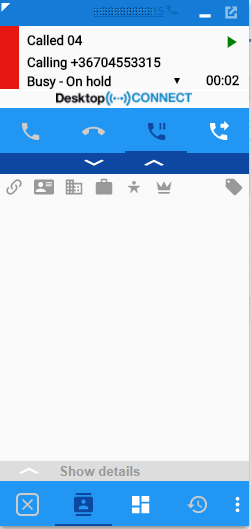
Any active call can be put to hold and then resumed by using the hold/resume button.
Calls on hold cannot be terminated.
Available actions are:
- Resume
- Initiate new call

Terminating a Call
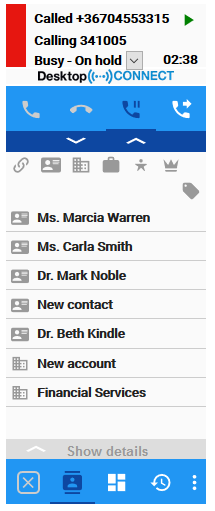
A call can be terminated with the use of the hang-up button or from the phone set.
Desktop Connect for CRM does not allow calls that are on hold to be terminated. Any call on hold needs to be retrieved prior to termination.

Consultative Call
Using Geomant Desktop Connect, consultation with supervisors or fellow members are available to agents.
Desktop Connect allows agents to place the customer on hold while they ask for consultation. Multiple call appearance are necessary in order to perform a consultation. The active call is placed on hold, either by explicitly pushing the hold button or by opening up a second call appearance and dialing the desired number.
Once the consultation is finished, the agent can choose from the following options:
- return to the customer
- transfer the call
- conference in the consulted party
Transferring a Call
Calls can be easily transferred between agents, agent groups or any other number that is allowed by the switch dial plan.
During a call transfer, the CTI information associated with the call is also forwarded to the receiving party allowing the application to perform a customer lookup on the receiving side.
The application allows users to make:
- Quick transfer
- Consultative transfer
Quick Transfer
Performing a quick (single-step) transfer while a call is active:
- Click the Transfer call button in order to activate the control presence.
- Type the extension number where you want the call to be transferred.
- Click the Transfer call button. The call will transfer to the number you've entered.
Two-step / Consultative Transfer
Performing a consultative (two-step) transfer while a call is active:
- Click the Transfer call button in order to activate the control presence.
- Type the extension number where you want the call to be transferred.
- Click the Dial button.
- Click the Complete Transfer button in order to complete the transfer - this can be done either before or after the second call is answered.
The receiving party has to answer the call first in order to make a consultative transfer.
During consultative transfer, the user can decide to complete the transfer or take back the original call which is placed on hold and continue the conversation.
Conference
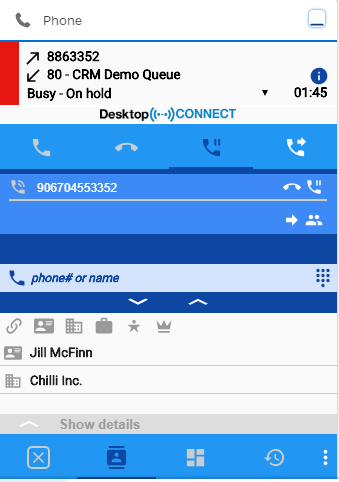
Making conference calls can be easily established using Geomant Desktop Connect. The application allows users to perform two-step (consultative) conference calls where the same rules apply as for transfers.
- Two-step conference can be made when a call is active and the user initiates the second call
- Once the second call is ringing, the user can press the conference button to join the two calls to make a conference
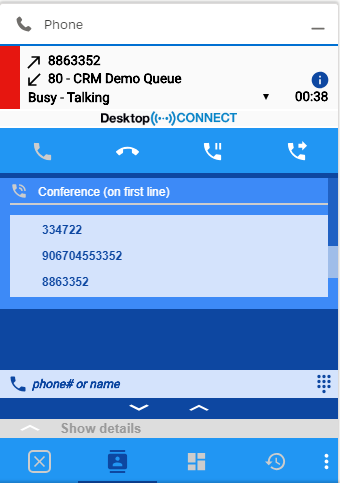
Conference call participants are displayed on the call control UI, the user can drop from the conference without terminating it (if more than one party remains).
Non-conference calls where a call recorder is listening in could appear as conference calls. Desktop Connect will label any call with more than two participants as a conference, not just calls created by the agent by joining two calls, and there is no method to distinguish non-person extensions (recorder ports, etc.)
Transmit Related Customer Data
It is possible to transfer the related customer details in the following scenarios:
- Conference calls
- Transferring calls
- Two-step conference
Details that can be passed with a transfer:
- Customer data - either selected from the CRM system or through Desktop Connect screen-pop
- Related objects, such as case ID or Call Work Code
- Comments added by the agents
The status of the call and the comments can be set manually by the agent.
Data Population
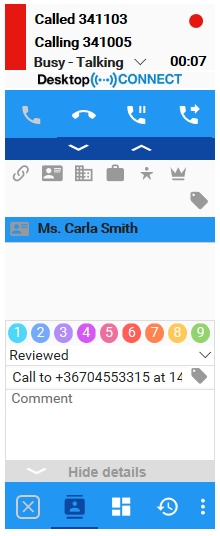
The entry of the contact calling the call center will be displayed on the Call Results Tab of the DC application if it has been added to the CRM system previously. This information is being forwarded to the receiving party of the transfer.
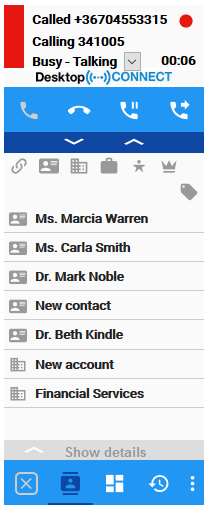
Multiple Related Data
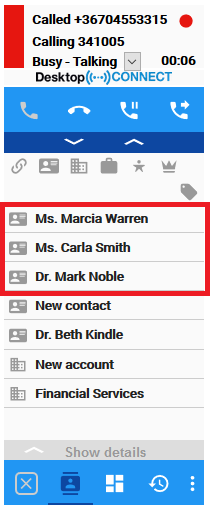
It is possible that several contacts belong to the same phone number. When a call is received from such a phone number, the Call Results Tab will display all the related contacts.
Select the contact manually in case of multiple results.
Dial Out
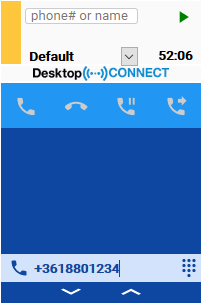
Desktop Connect for CRM offers agents the ability to dial a phone number using the application.
Users can perform the following actions:
|
You can dial a number from the header controls and the call appearance, as well.
Initiate the call by either clicking on the phone icon or pressing Enter.

Dial Pad
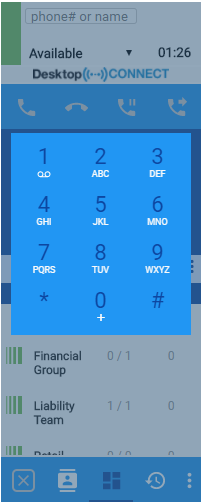
The dial pad is used to transmit DTMFs via Desktop Connect without actually using the phone. This is useful in cases when the agent needs to navigate in an IVR with an outbound call in place, for example.
Speed Dial
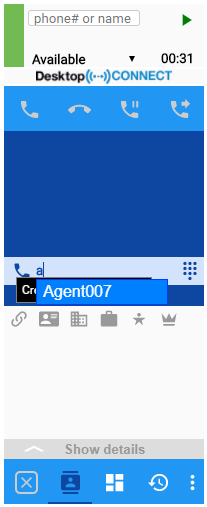
Numbers used frequently in the call center can be configured for quick access.
Users can dial the number by typing the name in the input box. e.g Main.
Click to Dial
Phone numbers can be dialled directly from within the customized CRM entities or from the entity list. A phone icon appears at every field with a click-to-dial feature enabled.
Please consult your CRM administrator or partner about the availability of this button on your CRM forms.

Screen-pop
Geomant Desktop Connect provides a screen pop function for alerting calls. Screen pop results and behavior can be modified in the application settings, allowing administrators to configure different behavior for incoming external calls, outgoing external calls and internal numbers.
A query is performed against the CRM system for every alerting call. The result is displayed on the Call Results Tab and the matching record is popped in the CRM system.
In case of multiple matches the Call Results Tab contains all objects listed in the softphone layout (this is defined in your Salesforce Setup > Call Centers > Softphone Layout menu ). If configured, the user is presented with a search page where the multiple results are displayed. Items displayed on the search page and Call Results Tab allow users to easily navigate to the relevant object.
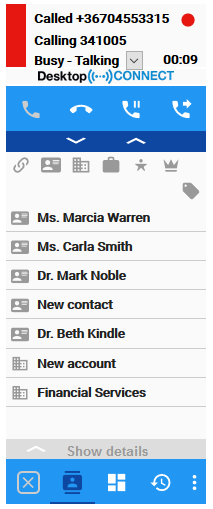
Search results will be sent to all open web apps and displayed, but only the most recently opened (assumed to be the active window) will pop the screen.
Note that unsaved edits in the active window will prevent navigating away from the page by the CRM system, so the agent must click on a link after saving data to perform the screen-pop.
Associating Objects with the Call
Geomant Desktop Connect automatically associates the object in the screen-pop window with the call, so this can be saved in the related call activity objects.
In cases where there is no automatic screen pop, for example the caller number was not recognized or multiple results were found and the results were presented on the search page, the user can associate the related object manually with the help of the Associate button.
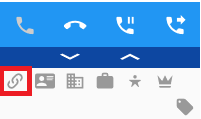
Creating New Objects
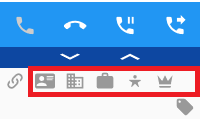
If the current object is not yet registered in the CRM system, you can create them during the active call.
Desktop Connect allows you to create the following objects:
- Contact
- Account
- Case
- Lead
- Opportunity
Use the icons on the Call Results Tab and the CRM will load the proper page. Fill in the details and save the object.
If you associate it with the caller during the call, next time the object will be populated automatically.
Details Panel
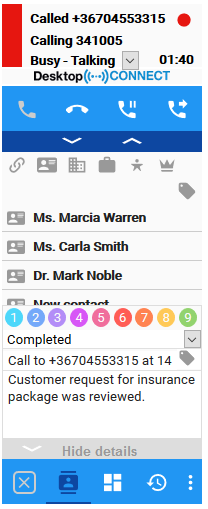
Geomant Desktop Connect allows agents to define the outcome of an active call.
- Click or double-click the Shows Details section to display the panel itself during an active call.
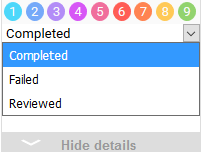
- Select the related call outcome code from the drop-down list.
- Enter a subject for the call task.
- Add any comments.
Call Outcome Codes
These are quick labels the user can apply to call records to describe the outcome of both inbound and outbound calls. The users can capture relevant information about the call and therefore keep track of customer history.
Header Controls
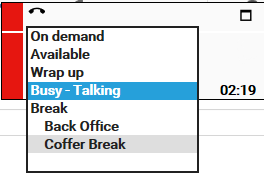
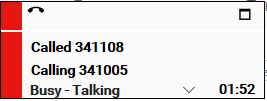
The application’s header (the top of its window) contains the control buttons of the phone’s first line. These call control buttons (Answer and Hang up) are only displayed when they are available. For an easier use, set the window to minimized state and the incoming call can still be controlled. This is a great use, when only the Dynamics popup and simple call controls are in scope.
You can also request a state change to break during an active call.

Call Comment Templates
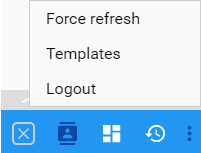
There is a list of predefined custom templates available to use when adding a comment to the call activity. It provides an easier and faster to way to summarize and wrap up similar calls.
- Click the Templates menu button to see the list of predefined texts.
- Select the preferred template.
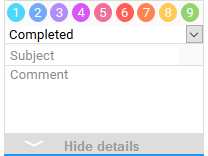
- Use the Show Details button to open the function during a call.
- Select the templates by clicking on its reference number.

Call Recording
Desktop Connect integrates with Avaya Call Recorder allowing users to start, stop, pause resume call recordings, recorded calls can also be tagged over the Desktop Connect user interface and phone call entity are enabled to store recording playback link.
Recording is possible if it is enabled and the user is licensed and properly configured for recording.
Start and Stop Recording
The recording is started automatically for each call in a default Avaya Call Recorder setup. However, Desktop Connect allows agents to stop and start the call recording if allowed by the recording system.
Recording related action buttons are located in the header of Desktop Connect.


Pause and Resume Recording
Recorded calls can be paused and resumed using the same buttons displayed in the header.
| Pause | |
| Resume |
Call Tagging
There are certain situations when the call center agent might want to tag the recorded calls to quickly identify an individual call or a particular moment that is captured through call recording.
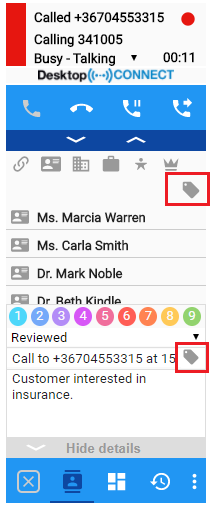
Desktop Connect allows the user to enter up to seven different tags for the recorded call using the Call Tagging button during a call that is being recorded.
The agents can add the details of the call and the caller along with the reason of the call in the Comment section, and these are all saved when using the tag button.
Playback Recorded Calls
Optionally, Desktop Connect can store the playback link within the CRM system's call activity entity. The playback link is stored in the phone call activity generated by the call. The link is saved in the Recording custom field.
Call Log
Geomant Desktop Connect can be configured to create a call activity object for the followings:
- Inbound calls
- Internal calls
- Outbound calls
The application allows the user to automatically or manually associate the entity with the call during talk time. It can also:
- categorize the call with an outcome code (Call Work Code) that can be used for reporting purposes
- enter the subject of the call
- add any comment on the fly
Desktop Connect stores call related information by creating a new phone call activity in the CRM system. Data stored consists of:
- Caller number
- Called number
- Associated object
- Date of interaction
- Duration
- Inbound/Outbound
- Call result
- Comments
- Universal Call Identifier
- User to User information
- Playback URL, where applicable
- Additional CTI info as configured in the call center settings
- Reference up to one person (Lead or Contact) and up to one other object (populates the Name and Related to fields respectively)
The associated object is set if a screen-pop search returns a single result, if the agent opens one of the results if there are more than one match returned, or if the agent clicks the link to associate the object currently open in that CRM window. The selected objects will be marked by appending (selected) to the name.
Logging a call can be disabled by selecting Personal from the drop down list when busy; this is set to Log call by default.
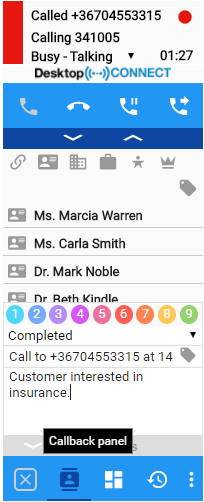
If configured, call outcome needs to be selected from a drop-down list instead of typing it in (Call Work Codes). These fields synchronize between tabs and to the server as the agent is typing them, so reloading the page before the log is saved will not cause them to clear.
The agent can edit the comment / subject / outcome of the call while in ACW state. The call log will be updated when the agent selects a new state (aux or ready).
Proactive Outreach Manager(POM)
Geomant Desktop Connect can make outbound automated campaigns, providing valuable information and enabling customers to take immediate action. When a campaign is started then all the customers will be automatically called in order one after another.
With POM the DC can:
- Login, logout
- Change agent state
- Create callback
- Consult
- Transfer call
- Hold/Unhold Call
- Release line to disconnect customer call
- Load the customer data in a popup window to view and modify their data.
Create callback
During call or during in wrapup state POM provides a callback feature to provide an agent the opportunity to get in touch with the contact at some later point in time. The Callback menu option is used to create callbacks, which loads a new form page that contains the various input fields.
A type has to be chosen for the callback. The callback types can be:
- Standard
- Agent
- Campaign
- Strict Agent
More information about the creation of callback can be found on this page: Avaya POM callback management
Customer's data popup window
After login a new pop window appears which contains the data about the customer(s). At the start of every new call, the popup windows is updated with the customer's information. During call we can view and modify their data from there.
After each modification the customer details will be updated in the database.
Rule based panel and buttons
Geomant Desktop Connect can be configured to show custom buttons in a side panel. These custom buttons each open an url in a new window.
If the call matches with a rule's condition then a panel will appear and it will contain the custom buttons which are configured in the rule. This panel also can be closed and reopened.
If the automatic popup windows feature is enabled, then at the start of the call the preconfigured automatic popup urls will be opened in new popup windows.
View and copy call properties
During call the properties of the call can be viewed, by clicking on the little "i" letter in a blue circle where the agent state information can be seen.
In the newly appeared window the call properties can be seen and by clicking on the copy icons the values of the properties can be copied to clipboard.
Working with existing call activities
When performing click-to-dial from existing call activities in Microsoft Dynamics UCI, Desktop Connect behaviour follows the below pattern
- After the user initiates a click-to-dial call from a phone call form and the call ends, then the page is automatically refresh after the phone call record is updated by Desktop Connect
- After the user initiates a click-to-dial call from a phone call form and the call ends, then any comments entered by a user in Desktop Connect are appended to existing value.
- "[Old Value] - [comment entered]" if old value exists and comment entered
- Old value if no comment entered
- Comment entered if no old value exists
- After the user initiates a click-to-dial call from a phone call form and the call ends, then if there already is a Universal Call Identifier for the phone call record a new phone call record is created.
Call Reports
Call reports are available in CRM under Reports → Call Center Reports.
Error messages
Error messages displayed are detailed in this article.
Frequenlty asked questions
For frequently asked questions follow this article.


