Wallboard Configuration - Desktop Connect for Salesforce
Overview
This document describes the steps to configure the Dashboard of the Desktop Connect for Salesforce.com.
Wallboard Settings
After a successful login to Salesforce.com and Desktop Connect, you will have the ability to create new dashboards for the Desktop Connect application's Queue tab.
The Wallboard Settings can be found on the menu ribbon.

Setting up a New Dashboard
Navigate to Wallboard Settings on the menu ribbon within Salesforce.com.
Click on New.
Enter the designation for the dashboard which is the name of the hunt group related to it and setup in the CC.
Click on Save to save the dashboard entry.

CTI Queues
A CTI Queue represents a particular business unit of a call center, a group of agents working in a specific skill. Both inbound and outbound calls are handled through this line. For example, Finance, Sales or Marketing.
After a successful login to Salesforce.com and Desktop Connect, you will have the ability to create new CTI queues.
The CTI Queues can be found on the menu ribbon.

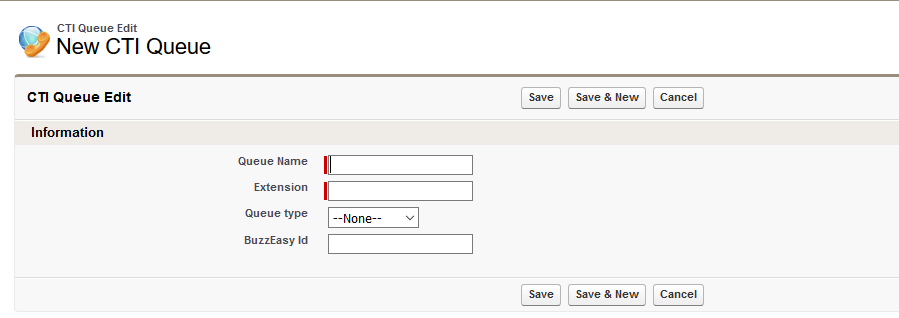
Setting up a New CTI Queue
Navigate to CTI Queues on the menu ribbon within Salesforce.com.
Click on New.
Enter the designation for the Queue name which is the name of the queue related to it and setup in the CC.
Enter the Extension related to the queue which will be used to handle the calls.
Choose the type of the group from the drop-down list.
- Hunt Group
- VDN
Specify the Buzzeasy ID, if there is any.
Click on Save to save the CTI queue.


Read about Buzzeasy ID in the Buzzeasy Queues