Create a User
You can create new users in the Settings/Users or in the Administrator/Users menu.
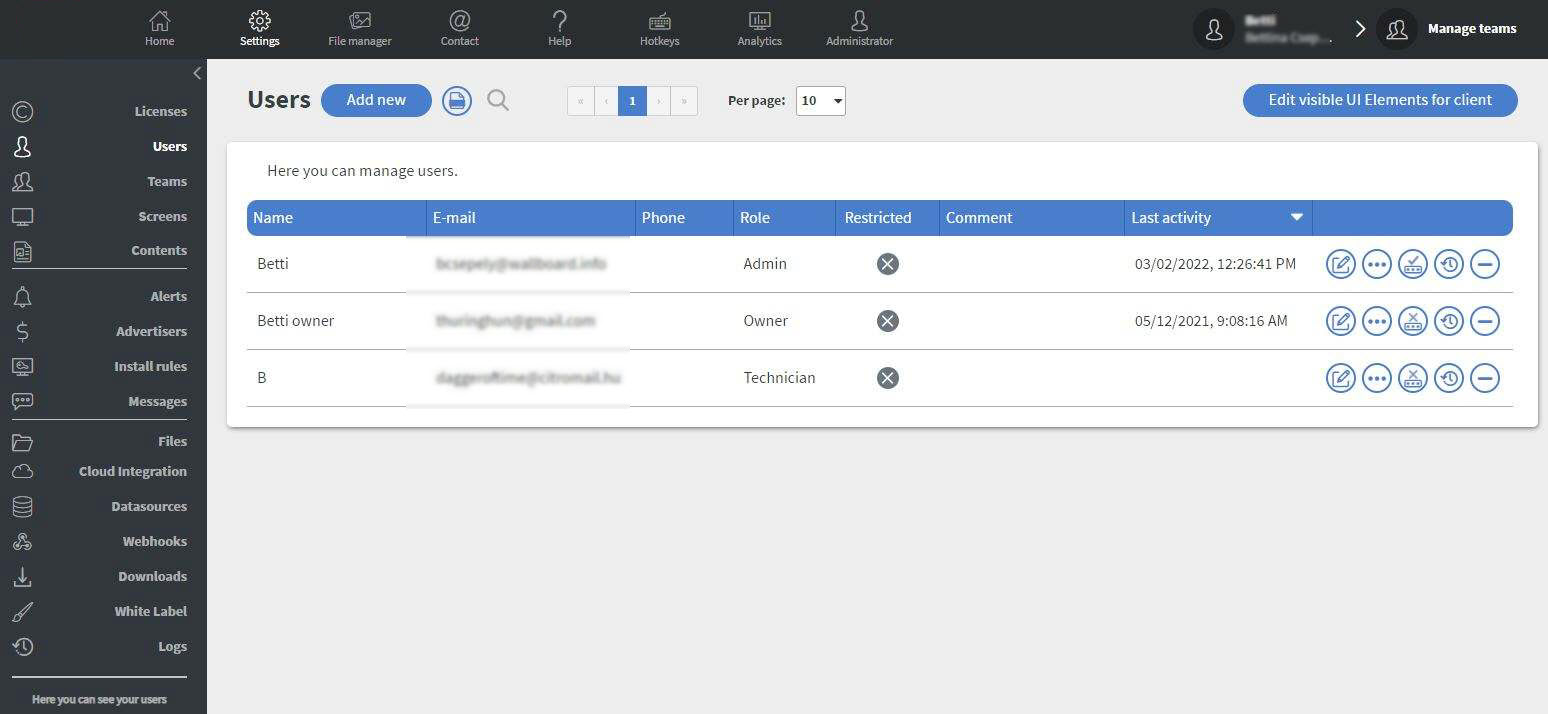
You can create new users, with the Add new button.
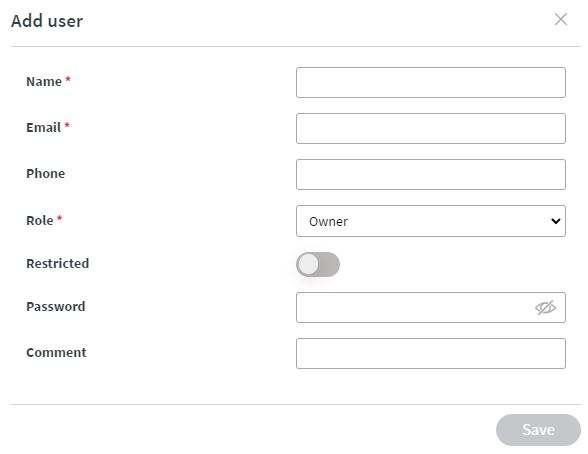
You have to fill in the user’s Name, E-mail address, and Roles.
If the server has configured SMTP service you do not need to give a password for the user. An automatic email will be sent to his/her email address to set a password in this case.
You can set a phone number and a comment for the user but this is general information only. Right now our system does not use this data.
If you set a user as restricted, he/she will not be able to login into the system until you remove the restricted status from the user.
If you switch on the Use 2FA option, the user can only log in if he/she uses his/her password and the Google Authenticator code simultaneously. The user can find the necessary QR code in his/her Profile. See more about two factor authentication.
With the Edit visible UI Elements for client button, you can manage what the users under your client can see. For example, disabling the Add Content button on Summary. In this case, nobody on your client will see the Add content button, including you. You can come back and enable the disabled functions anytime.
You can select a team for the user. This option is only available to users that have Technician or lower role. See more about Teams.
 Edit visible UI Elements on a user. It is exactly the same as Edit visible UI Elements for client but it only affects the selected user.
 Set a pin code for the user.
 Check the logs of the user. Logs show what the user did in the system previously.
 Remove a user from the system.
 Download a statistic about your users.