Geomant Call Center Settings in MS Dynamics CRM
Package Version Information
Disclaimer
Installing and configuring the DC4CRM managed package requires some general Dynamics expertise and various privileges/permissions on the Dynamics user. It should be installed either by the organizations Dynamics administrator, or with continuous consultation between the installing engineer and the organizations Dynamics administrator during the project.
DC4CRM installs various custom objects and adds custom fields. It is permitted to develop additional customization using these custom objects and fields, but unless specifically agreed upon, Geomant is not responsible for the maintenance or correctness of custom code outside the package. It is recommended to notify Geomant before developing such extensions.
MS CRM 2013, 2015, 2016, Dynamics 365
- Publisher: Geomant
- Use the package found in the .iso, /Extensions folder
- Latest version: 3.5.14
Customizing the CRM
How to Display the Call Center entity in the Settings Ribbon
After the Call Center managed solution has been installed, customization of the system is required in order to display the call center entity in the Settings ribbon page.
Navigate to Settings → Customization using a CRM administrator account.
Choose the Customize the System menu.
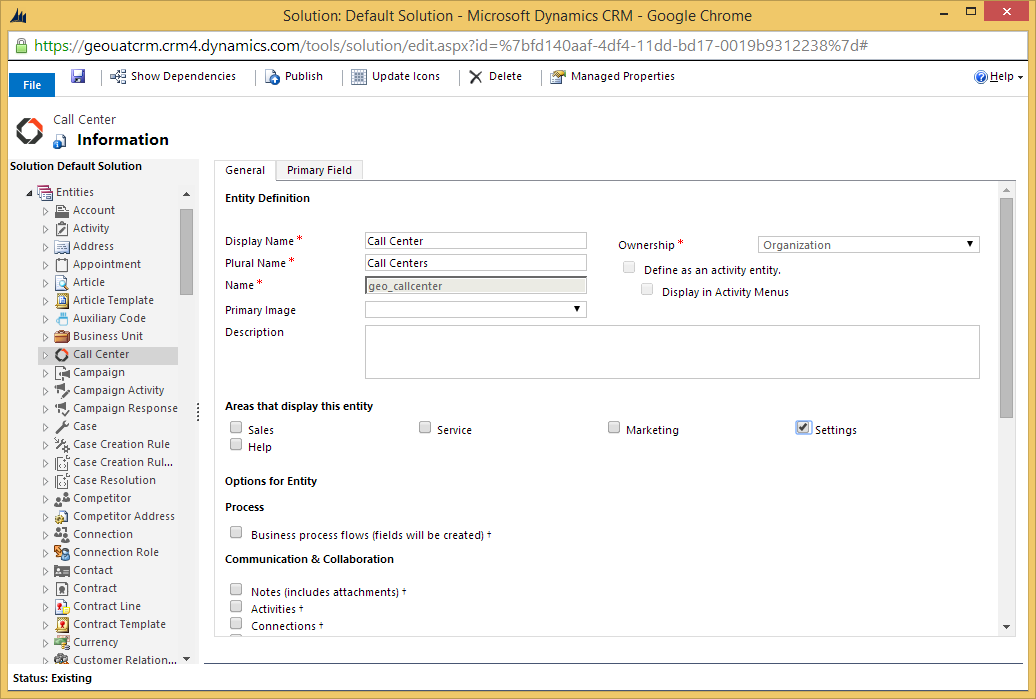
Locate the Call Center entity under **Entities.
**- Enable Settings in the Area that display this entity on the entity default view.**
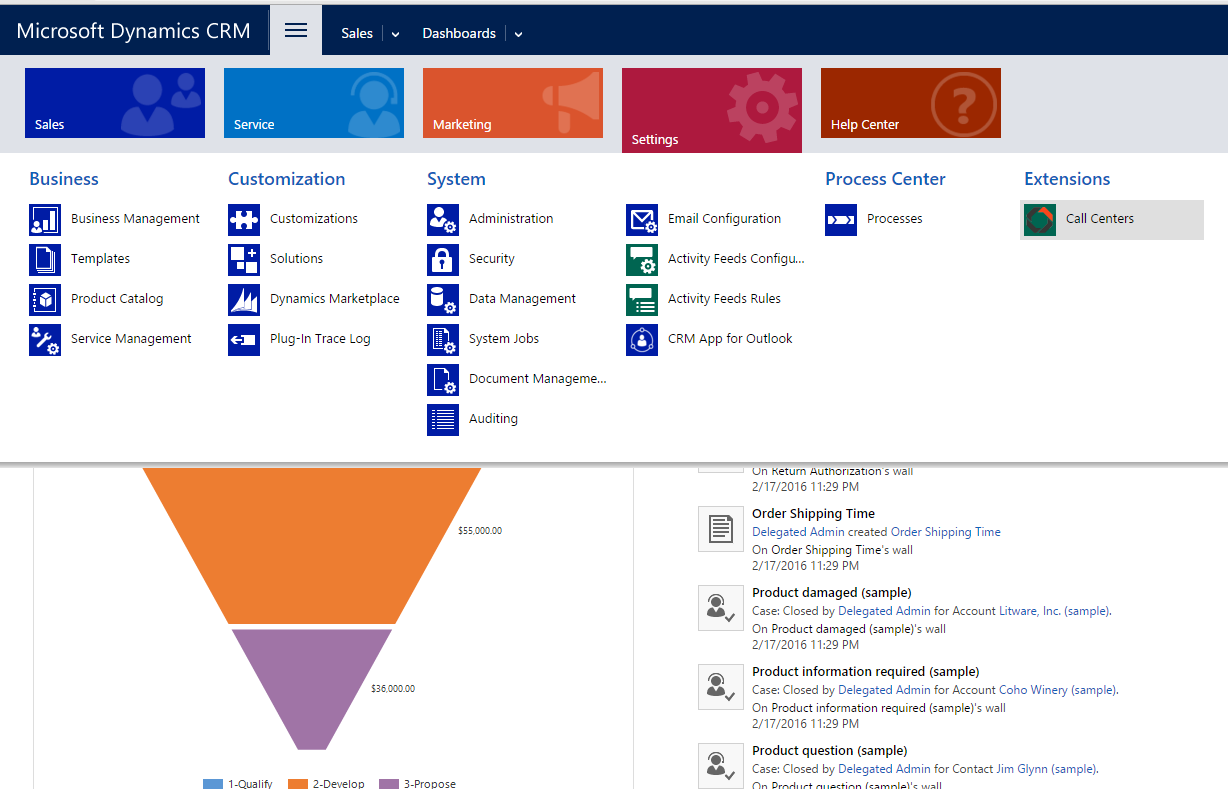
** - After the changes have been saved and published the new entity is available under the Settings ribbon bar.
Click to Dial Customization
Geomant Desktop Connect offers a set of Jscript libraries that allow CRM administrators to enable click to dial from any given entity form. The following describes how to enable click to dial on the Contact entity form.
Navigate to Settings → Customization using a CRM administrator account.
Choose the Customize the System menu.
Locate the Contact entity under Entities.
Open the Contact main form.
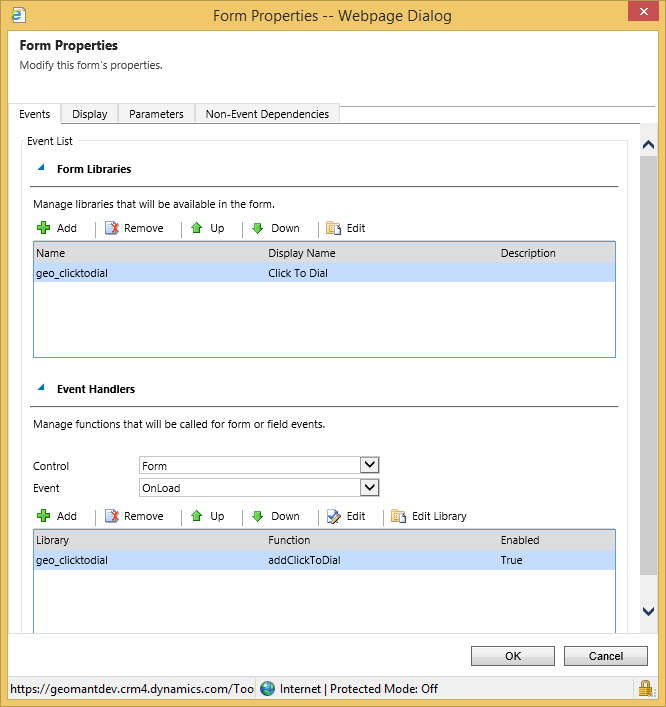
Navigate to Form Properties.
Add the following managed libraries from the Desktop Connect managed solution:
- geo\_clicktodial
Dynamics 2015, 2016 Microsoft has changed the UI rendering mode starting from Dynamics CRM 2015 Update 1. When customizing systems with the new user interface rendering mode the following script needs to be included in the OnLoad event:
- geo\_jquery.min,js
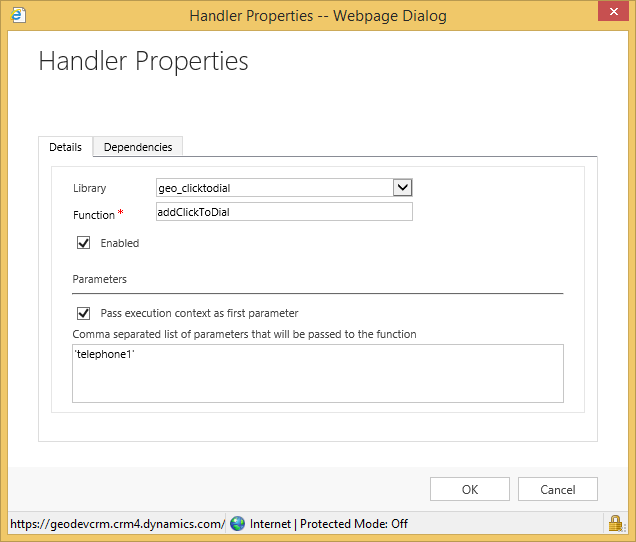
- In the Event Handlers section, add the following Jscript function from the geo_clicktodial library:
-   *addClickToDial*, specifying the field that you wish to enable and passing the execution context as a first parameter
-   Multiple fields can be specified separated by a semicolon, like
    '*telephone1;telephone2;mobilephone'
     *
- Save and publish.
Setting Up the Geomant Call Center
Geomant Desktop Connect allows administrators to setup multiple call center settings for different departments and tenants.
Geomant Desktop Connect allows CRM administrators to specify for each call center setting.
Navigate to Settings → Call Center to configure the call center settings.
Create a new call center record by specifying the display name and Geomant Desktop Connect server location.
Specify the following:
- Server location
- Dialing options
- Screen pop options
- Agent State Labels
- Not ready reason codes
- Call work codes
- Directory numbers for speed dial
- Call logging options
- Softphone layout
- User assignment
Follow the steps described in the Call Center Ribbon Settings article.
Further details on Desktop Connect configuration are described in the Configuration File Properties section of the Configuration Guide.
| Property | Sample value | Description |
|---|---|---|
| Name | Geomant Desktop Connect | The display name of the call center setting. |
| Desktop Connect Server Url | [https://[server IP/FQDN]:[Port]/dc4crm/index.html?crmType=dynamics&aesindex=[GEOCCILIB index]&tenant=[TenantID]&wbHost=[server IP/FQDN] | The URL of the deployed Geomant Desktop Connect server component. |
| Recorder Address | recorderIP:recorderPort | Avaya Call Recorder address and port. |
**
**
Configuration of Dialing Options
An administrator can specify the dialing options for the given call center by specifying the below details.
| Property | Sample value | Description |
|---|---|---|
| Outside Prefix | 9 | The prefix used to reach the Public network from the switch. |
| Internal Number Length | 4;5;6 | Comma separated list that recites the possible number of digits of an on-PBX extension. |
| Long Distance Prefix | 0 | Area code. |
| International Prefix | 00 | The international dialing prefix. |
| Country Code | GB | Default region for number recognition. |
Configuration of Screen Pop Options
Geomant Desktop Connect performs a screen pop for every incoming and outgoing call.
| Property | Sample value | Description |
|---|---|---|
| Number lookup format | E164; International; National; Default | Lookup format used to match CRM records with the incoming caller number. Possible values:
|
| Softphone Layout | Controls what entities are retrieved from the CRM and how screen pops are handled. | |
| Obtain contact Id from UUI | Yes/No | Specifies if the application should perform a lookup based on the UUI information and pop the phone call entity with the ID carried in the UUI field. |
| Match Last N Digits | Whole Numbers | Specifies the number of digits to list screen pop results, which are based on the last X digits of the caller's phone number. |
**
**

Softphone Layout
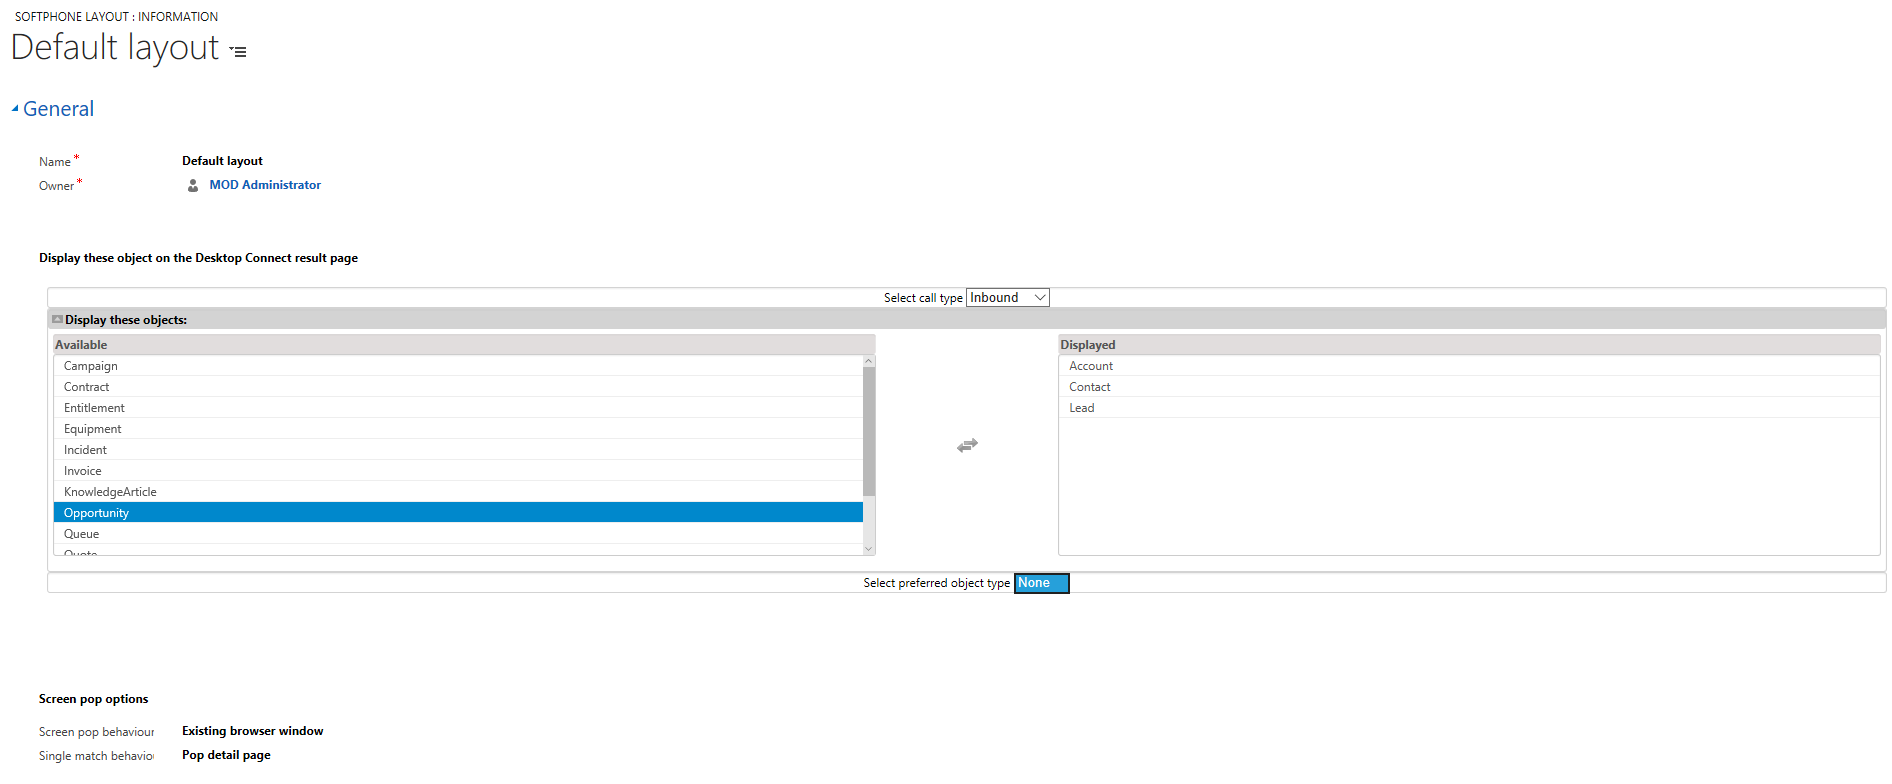
Geomant Desktop Connect allows CRM Administrators to define the softphone layout that controls screen pop behavior.
Softphone layout defines what entities to query upon an alerting call and what fields to display if a match is found, such behavior can be defined for:
- Inbound calls
- Outbound calls
- Internal calls
Administrators can define the following screen pop behavior for inbound calls on the softphone layout:
| Property | Sample value | Description |
|---|---|---|
| Screen pop open behavior | Existing browser window/ New browser window or tab | Defines where to open the entity if a single match is found. |
| Single match behavior | Pop detail page/Don’t pop any screen | Defines whether to perform a screen pop or not if a single entity is found for the alerting call. |
**
**
Preferred Object Type for Multiple Match
Defines if the multiple match search page is opened when multiple matches are found and what object type to present.
Configuration of Agent State Labels
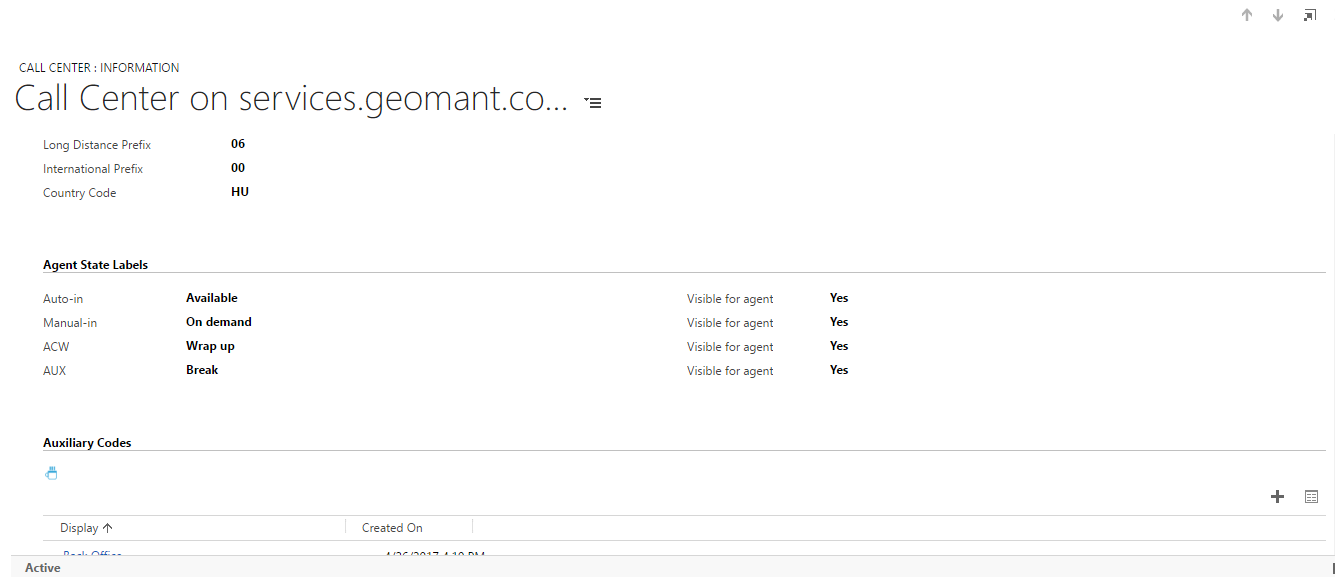
Geomant Desktop Connect allows CRM administrators to define whether the built-in agent state labels are visible for the agent. They can even modify the designation of these labels.
CRM administrators can set the codes under the Agent State Labels section.
Click on the preferred label and enter a name of your preference.

Configuration of Not Ready Reason Codes
Geomant Desktop Connect allows the use of appointed Not Ready Reason Codes besides the built-in agent states. These reason codes are used for describing a state when the operator is not able to handle tasks.
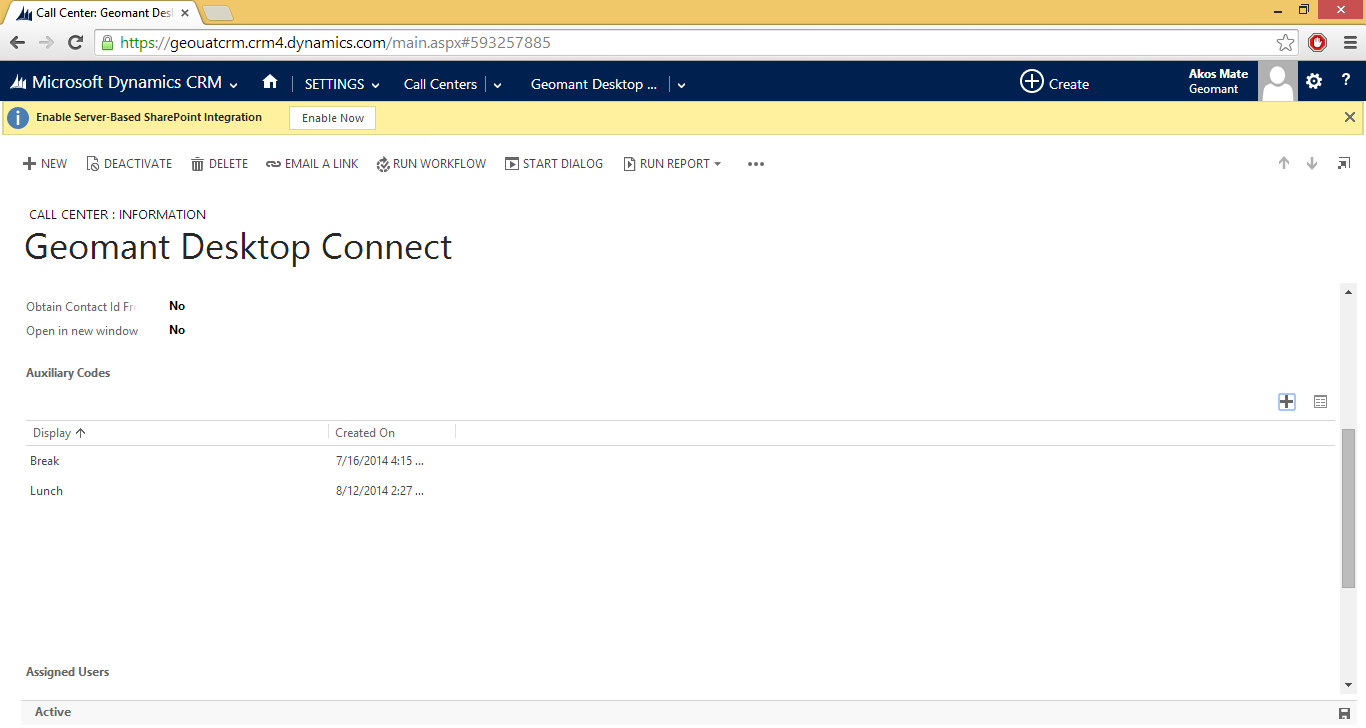
CRM administrators can set the codes under the Auxiliary Codes section.
The following fields need to be specified:
- Display – the alphanumeric name of the *Not Ready Reason Code.*
- Value – the value of the Not Ready Reason Code as configured in the PBX not ready reason table.
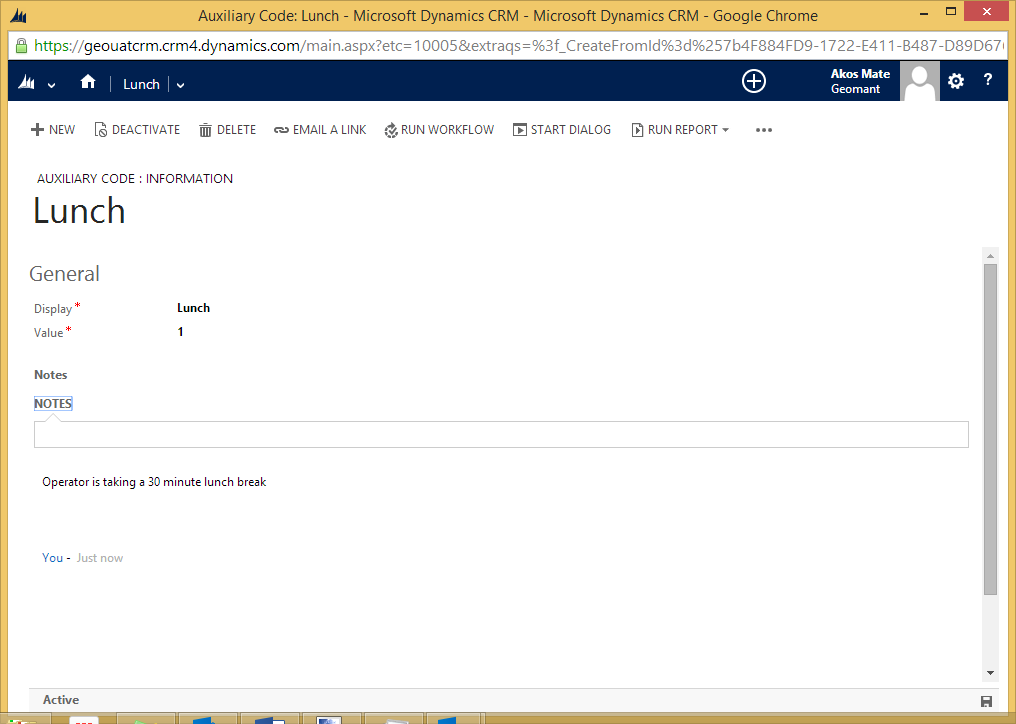
Geomant Desktop Connect for Microsoft Dynamics accepts one or two digit not ready reason codes.
Configuration of Call Log Templates
Geomant Desktop Connect allows the use of predefined comments for an easier and faster way of summarizing similar tasks.
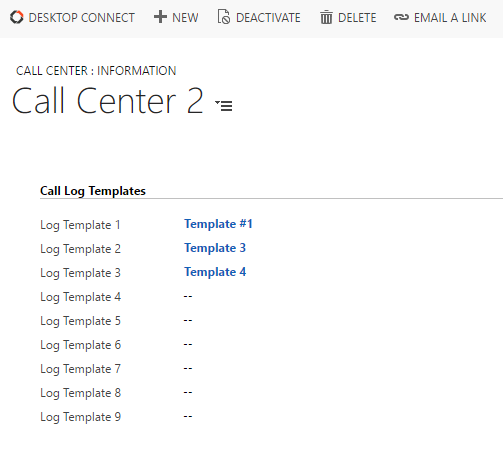
CRM administrators can set the texts under the Call Log Templates section.
Click on the editable field of the template.
Use the search button to look for existing templates.
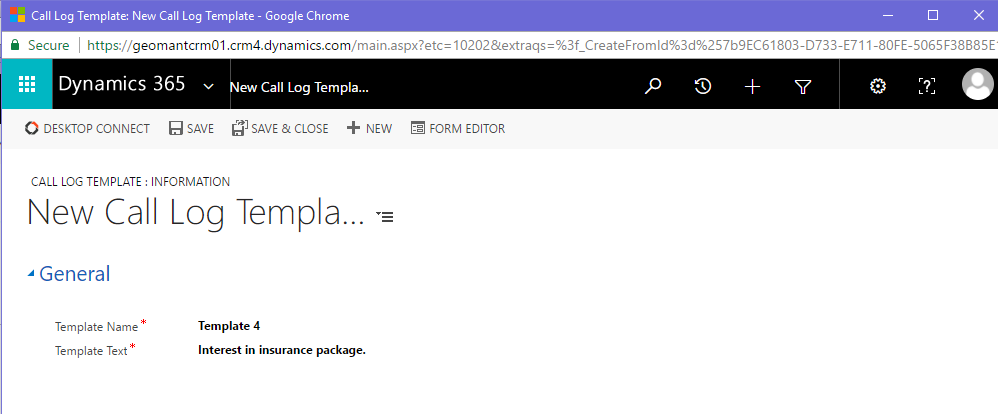
Use the +New button to create new content.
Specify the Template Name and the text of it.
Click Save.
The newly created template is added to the slot.
Configuration of Call Outcome Codes
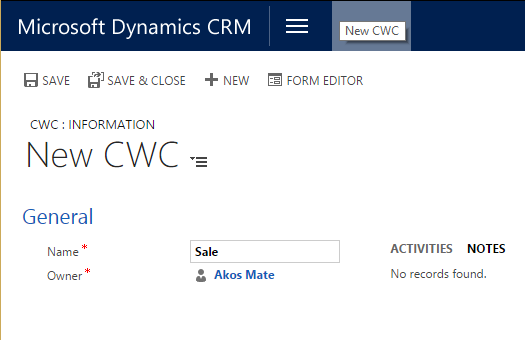
Geomant Desktop Connect allows the use of appointed Call Outcome Codes. Such codes are used by the business in order to categorize a call. CRM administrators can set such codes under the Call Outcome Codes section.
The following field needs to be specified:
- Name – The alphanumeric name of the business tag.
Configuration Directory Numbers
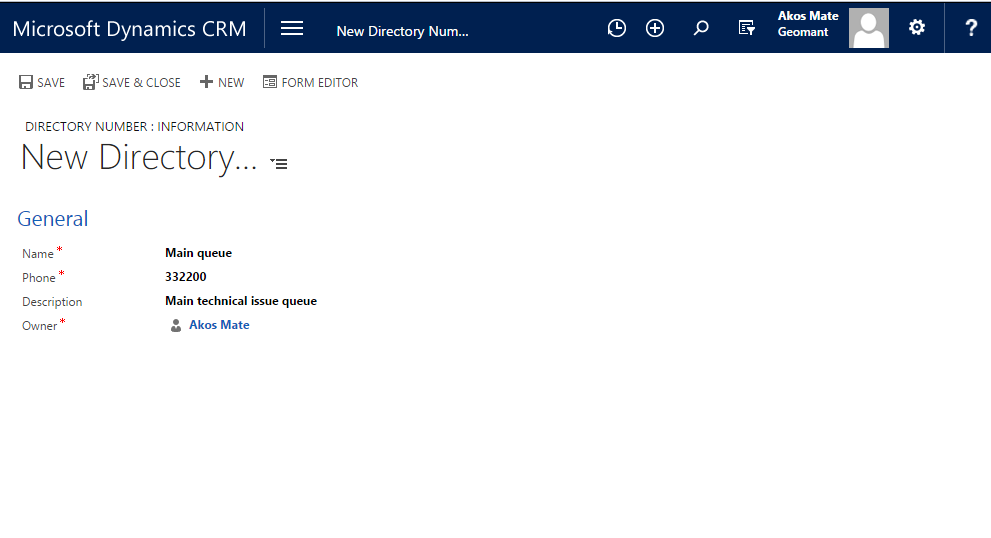
Geomant Desktop Connect enables speed dial function. Frequently dialed phone numbers can be stored in the call center settings under the Directory Numbers section.
The following field needs to be specified by the CRM administrator:
- Name – The alphanumeric name that the user can search for.
- Phone – The phone number/extension that needs to be dialed.
- Description – Description of the entry.
User Assignment
Users need to be assigned to the call center in order to use the Geomant Desktop Connect softphone functionality. This can be performed by the CRM administrator within the call center settings under Assigned Users section.
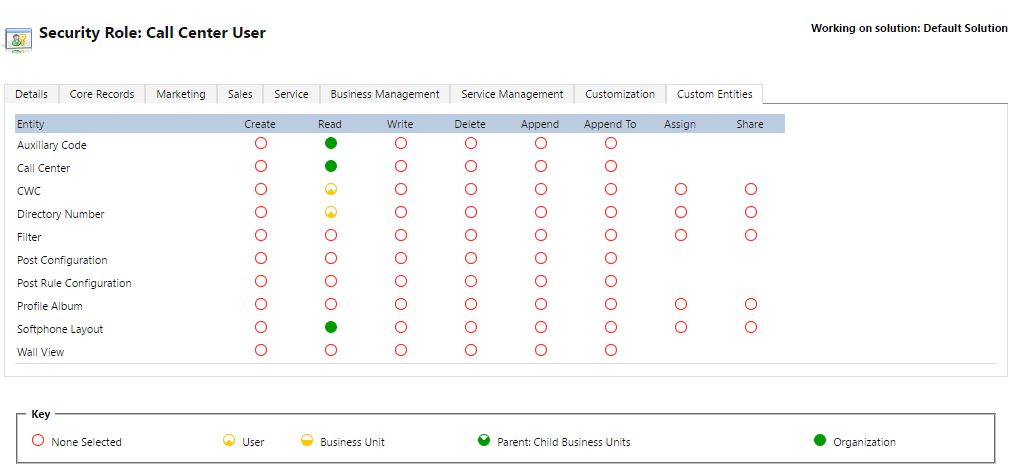
Each user that is assigned to a call center needs to be added to the Call Center User security role.
The Call Center User security role gives permission on entities added during the deployment of the Call Center package. This includes the following:
| Entity | Description | Permission | Access Level |
|---|---|---|---|
| Auxiliary Codes | Gives access to not ready reason codes configured in the call center setting | Read | Global (Organization) |
| Call Center | Allows users to access the call center settings | Read | Global (Organization) |
| CWC | Enable the use of call work codes, administered in the call center setting | Read | Basic(User) |
| Directory Number | Grant access to directory numbers defined in the call center setting | Read | Basic(User) |
| Softphone Layout | Allow application to perform screenpop as defined in the softphone layout | Read | Global (Organization) |
