Wallboard - Linistry integration - connector setup
Geomant does not support this feature at this time. For more information, please contact us at supportdesk@geomant.com
This document will walk you through the steps of setting up the Linistry integration connector module in your Wallboard system.
Only wallboard system super admins can set this module up!
First, you need to install the connector custom module into the custom scripts environment of Wallboard.
Download the whole module .zip:
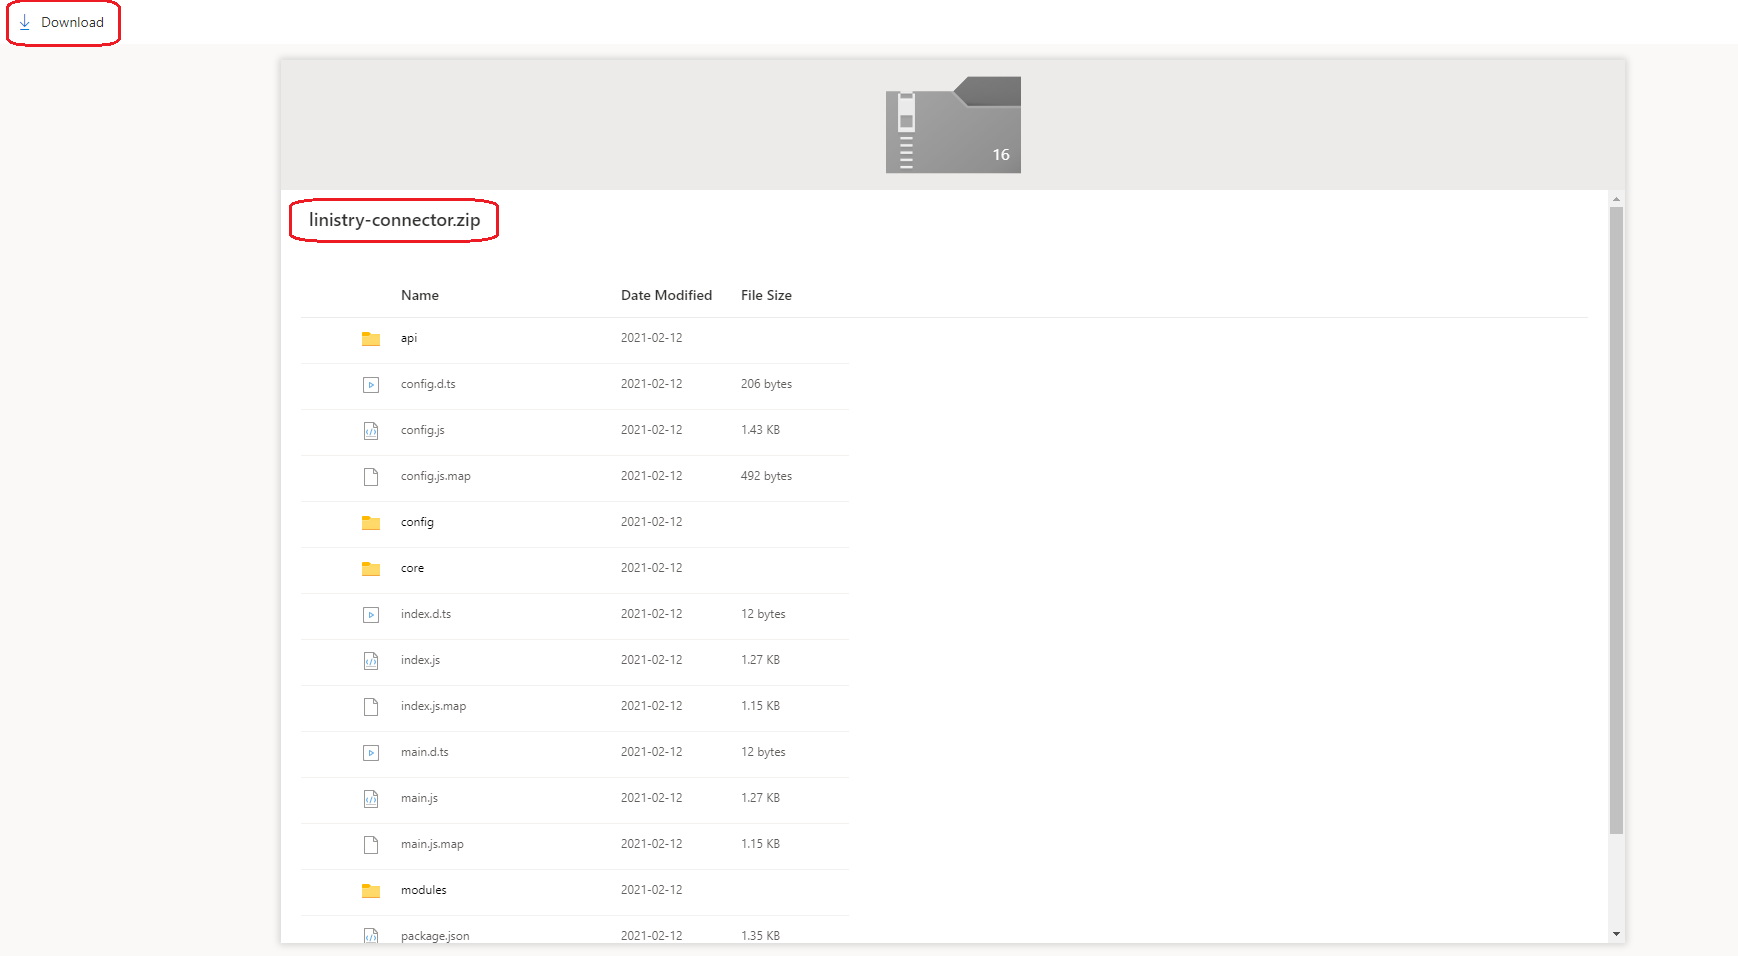
You can download the module here.
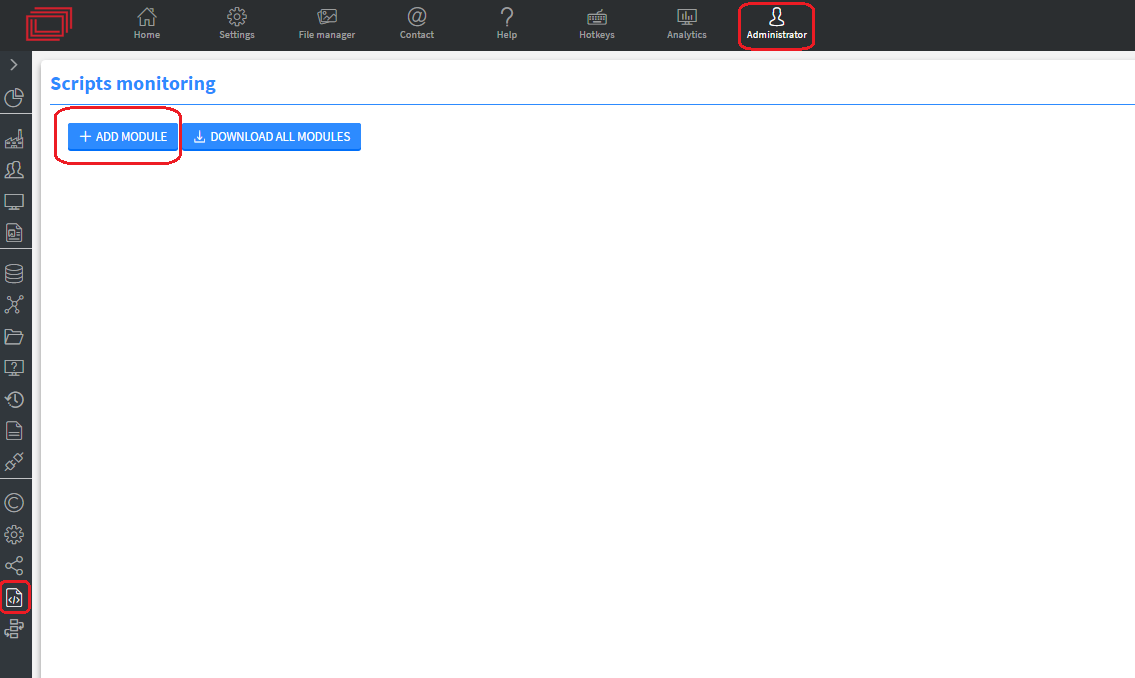
Go to the Scripts menu under the Administrator page and click the add module button.
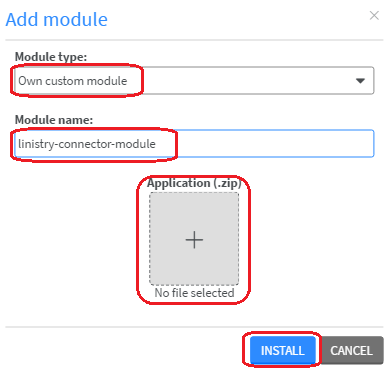
Select the Own custom module type and name your module. (The name of the module can't contain white-spaces and special characters).
Upload the module .zip and click install.
You will need to set up one Wallboard client for each Linistry branch, but you can use this single connector module for every Client / Branch since the credentials will be provided by the datasources.
After the module is installed
Before we start configuring the integration on the Wallboard side first we have to provide the following details to Linistry, so they can configure their side of the integration:
- Your Wallboard server address (like: https://editor.wallboard.info)
- Wallboard Webhook API key (see how you can get this key below)
Once Linistry has this information and they configured their end, they will provide you the following:
- Client ID
- Client secret
- branch IDs
- display IDs
Setting up Webhook API keys
Go to the webhooks menu and to create a Webhook API key. Linistry will use this key to authorize when calling our webhook. (Provide this key to Linistry.) You will only need one of these keys per Wallboard client / Linistry branch.

Wallboard side configuration of the integration
We recommend that one wallboard datasource is set up per Linistry display (as setup in the Linistry platform) that contains all of the unique data for that display. You will use these datasources later to display the data in your Wallboard contents.
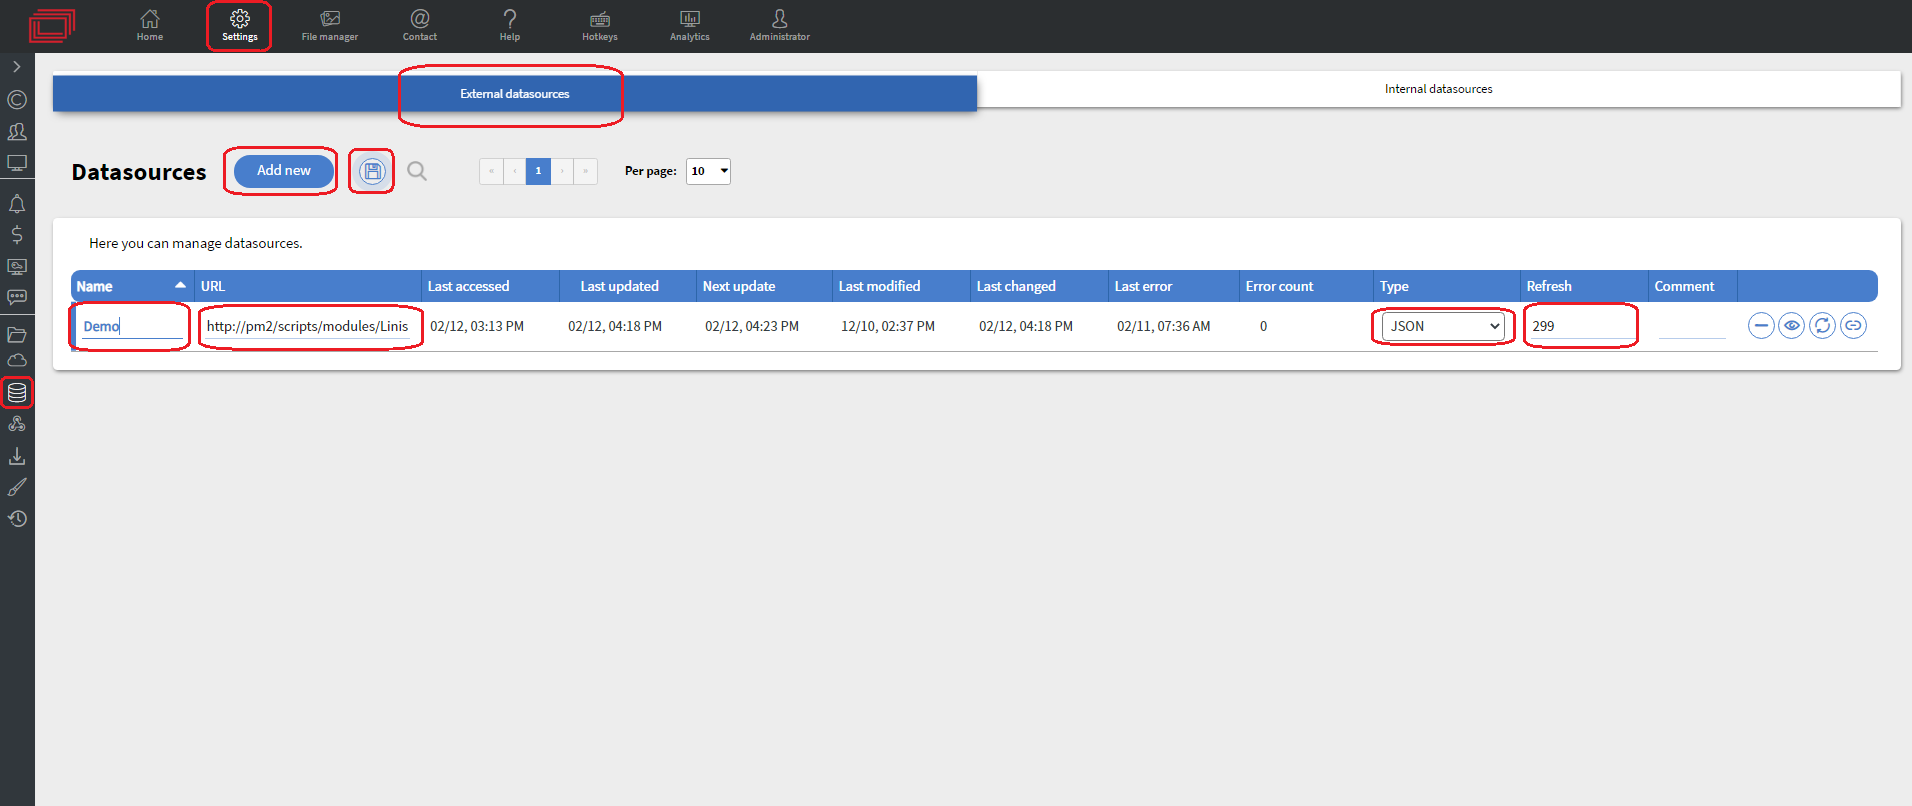
Navigate to the datasources section on the settings page and add a new datasource as shown on the example below.
Your datasource URL should follow this format:
http://pm2/scripts/modules/{{moduleName}}/api/datasource?clientCredentials={{clientCredentials}}&branchId={{branchId}}&displayId={{displayId}}&count={{count}}
- moduleName : The name of your Linistry connector custom module which you created in the previous step.
- clientCredentials: Basic authentication provided by Linistry (Base64 encoded username:password combination; you can use a tool like this to encode your credentials)
- branchId: Branch ID provided by Linistry.
- displayId: Display ID provided by Linistry.
- count: page count (Number of person to display from the specific line)
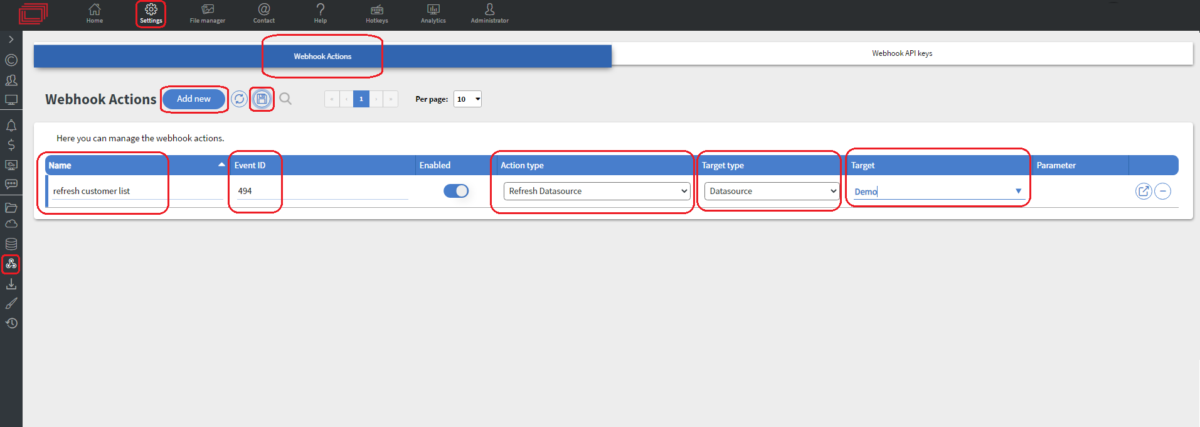
You will also need to set up one webhook for each datasource.
These webhooks will be called by Linistry to refresh our datasource whenever there is a change in the line dataset.
Make sure you have the Webhook API keys set up from the previous steps and then you can start setting up your different webhooks, one for each of your datasources.
Select the Refresh Datasource action type, Datasource as the target, and one of the datasources set up in the previous steps.
The Event ID of the webhook should be the branch ID from Linistry which you defined for the selected datasource.
At this point, all that's left is to add your Wallboard devices the regular Wallboard way and create a content that can display the data from these datasources.
You can follow this guide to see how you can create a simple content to display Linistry lines.