Installation on Android
Enable a WiFi or Ethernet connection on the device.
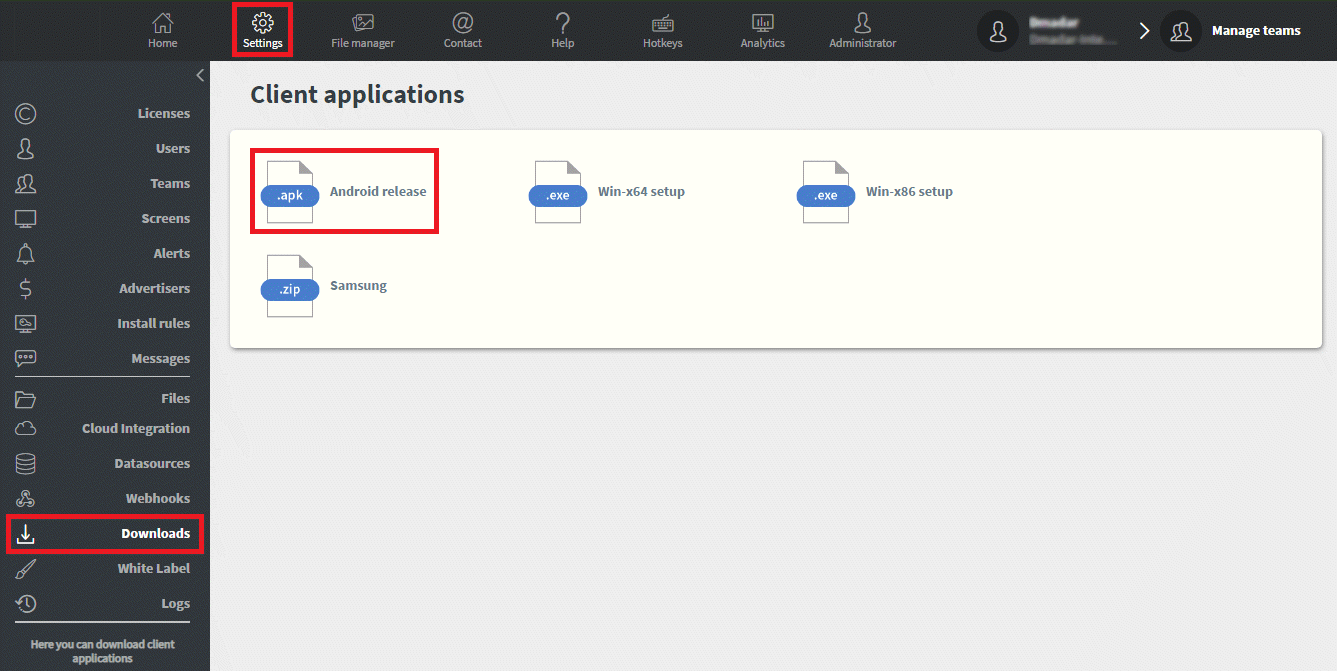
Download the installer from the Editor website. You can find it under the Settings menu and go to the Downloads sub-menu.
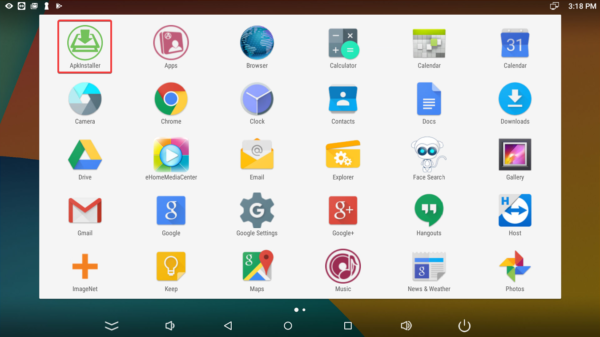
Copy the .apk file to a Fat-32 formatted flash drive and install it on the device via the Apk Installer application found under All Apps. *Appearance of menus may differ depending on the media player that you are using.
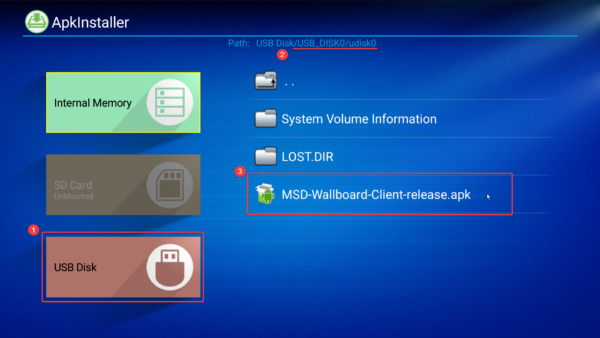
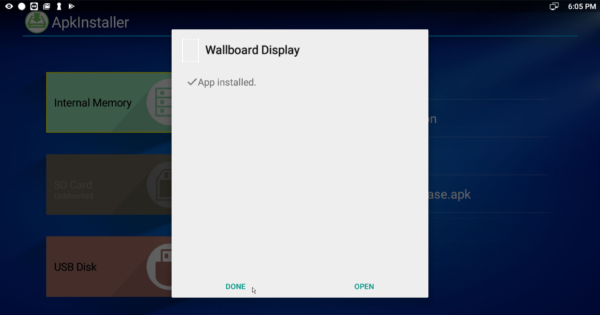
Once in the Apk Installer, select your USB drive and navigate to the folder path that contains the Wallboard application that you installed. Now click on the file and click Next until you have finished installing Wallboard.
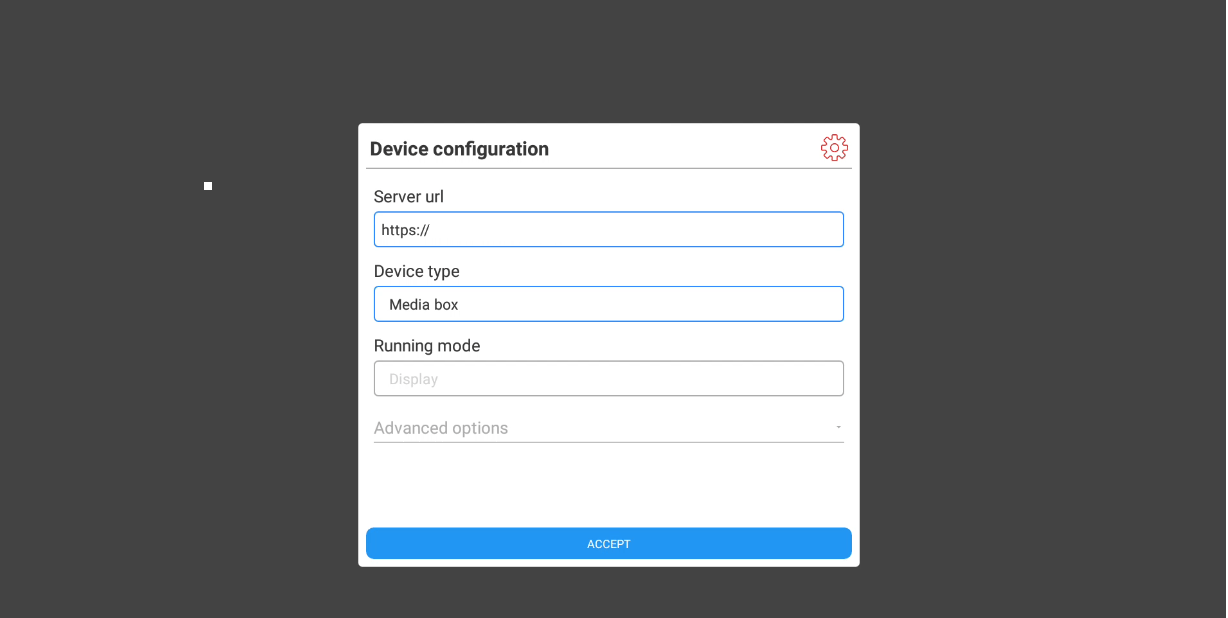
Start our client application and set the server URL if that needs to be changed.
If you open the Advanced options, you will see some additional settings for the application.
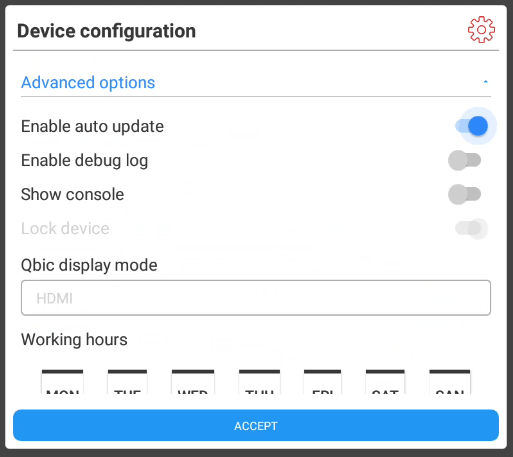
- Enable auto update: This allows the application to update itself when the next reboot occurs if it already found a new available update. Only works on Rooted devices.
- Enable debug log: This allows the application to store a more detailed log.
- Show console: After accepting the configuration, the console window will appear on the screen.
- Lock device: Disables default unused system applications and makes Wallboard application a system app. For more information about locking: Locking Down Android Devices
- Qbic display mode: This function determine how Qbic devices will react to Display On/Off commands. If you set HDMI, the application will stop the HDMI source of the device. If you set CEC, the application will turn on/off the CEC capable screens.
- Working hours: You can set up a time range and select days when the device will be awake and work. On unselected days the device will stay in sleep. Currently, it only works with supported Qbic and Giada devices!
If you do not want your device to be locked down you can set the Wallboard app as the Home app. Every time the device turns on the Wallboard application will be started automatically instead of the Android home, or home selector.
After accepting the configuration the application will register on the server and you will see the temporary id in the bottom-left corner.
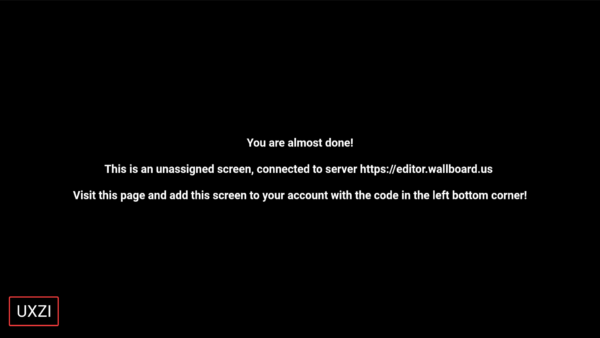
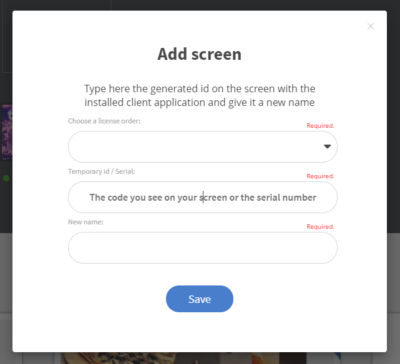
With the temporary code, you can register the device under your account within the Editor's interface. Click the (+) icon in the Screens section and then press Screen.

Type in the code you received, select a license order and name your device.
Your screen should now show up in your portal illuminated with a green circle indicating that it is online.
