The Flowchart of IVR Designer
A flow is similar to a directed graph. It has nodes and directed edges (paths) between them.
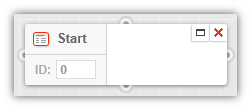
Nodes are represented as small boxes in the Stage of the IVR Designer. Templates are similar to nodes as they can be connected to flow items the same way as nodes, but have a different icon.
Connections are defined using connector curves and can be connected to the nodes / templates through ports. Every node and template box has four ports, one on each side of the box – these appear when hovering the cursor over them.
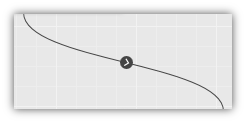
Curves are the visual representation of the connections, represented by Bézier-curves on the stage.
Each connection represents one or more paths – the potential logical 'outcomes' of the nodes or templates. An arrow at the middle of the curve indicates the direction of all the paths in that connection.
The type, name and ID of the node / template are displayed on the left side of the box. The Edit and Delete icons are located in the top right corner of the box.
Tip
Deleting a node or template also removes all the paths connected to it.
Nodes and templates can be dragged from the respective palettes at the right of the screen onto the stage, and can then be moved around by clicking their titles, holding the mouse button and moving the cursor to the preferred location on the stage, then releasing the button if the box is in the desired position.
Editing Nodes
Click the Edit icon ![]() in the node or template box to open the edit form of a node or a template.
in the node or template box to open the edit form of a node or a template.
Every node and template has an ID and a description field. The ID is automatically assigned and is a mandatory attribute.
The description is optional, though it is highly recommended to use it to describe what exactly the given item is used for in the flow.
Other settings depend on the specification of the node or template. These additional attributes can also be modified in the edit view.
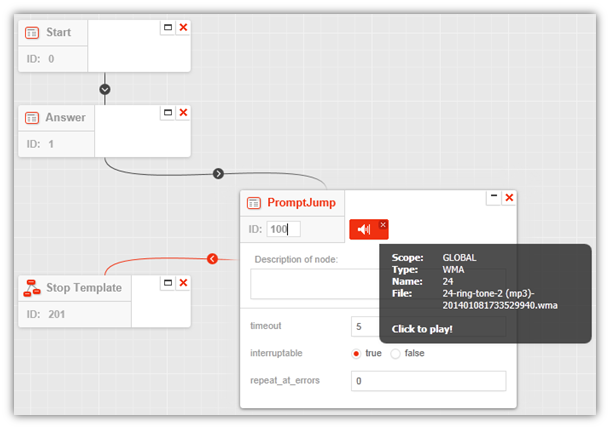
The type of an input field depends on the format of the attribute value, e.g. boolean values can be set via radio buttons, string values can be typed in text boxes etc. In some cases, the attribute has a limited value range available from a preset drop down list.
Several attributes accept variables as values.
Numerous nodes and templates are capable of playing one or even more announcements.
Check the Announce Node article for more details on using the announcements.
Click the collapse ![]() icon to collapse – effectively close – an edit form of a node or template.
icon to collapse – effectively close – an edit form of a node or template.
Tip
IDs of the node or templates can be changed without opening the edit form.
Connecting the Nodes
The process order of the nodes – or in other words the call flow – can be specified by setting up directed connections between the nodes. In general, every node or template accepts one or more input connections and allows one or more outbound connections.
Create a Node in the Flow
Move the cursor over the node to be specified as the starting element of the path.
Click one of the ports appearing at the sides of the box.
Hold the mouse button down while moving the pointer over to one of the ports of another node that is going to be the receiver of this connection.
Release the mouse button.
If the operation was successful, a new connection is built between the two nodes, the path direction is pointing from the starter node to the receiving node.
Changing a Connection in the Flow
Click the connection curve representing a connection once. The curve is highlighted.
A label will display the name of the current path(s) next to the array of the curve.
Move the cursor over the label, so a complete list of all available paths will be displayed. The paths previously set are highlighted. Paths with a gray text color cannot be selected for this connection – that happens when a path is already assigned to another connection.
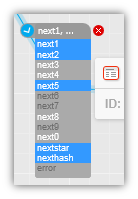
Select the path or paths to be set for this connection. For selecting multiple items, hold down the Control or Shift keys on your keyboard while clicking.
Click anywhere on the stage to hide the label with the new connection path options.
Deleting a Connection from the Node
Click the connection curve you intend to delete.
Move the cursor over the label that pops up at the middle of the curve.
Click the delete icon
 at the top of the path list.
Tips & Tricks
Most of the nodes and templates accept multiple paths and connections. However, the incoming and / or outgoing paths may be limited for several items – e.g. the Start node can not have an incoming path.
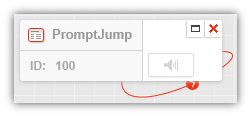
A connection can even loop back to its source node for nodes where cyclic operation needs to be provided (e.g. PromptJump). To do this, establish the connection between different ports of the same node or template.
Tip
We recommend connecting the top-and-right or the bottom-and-right ports for loopback scenarios – this way it is easier to select these paths later.
Path Colors
The connections are also color coded depending on the type of path they represent.
 Standard connection Standard connection |
The default path type with no special handling is required. |
 User input User input |
Path indicating the starter node will use when a user input is required (e.g. key press by the caller). |
 Error path Error path |
Path indicating the starter node will use in case an error situation occurs. |
 Collector output Collector output |
The outgoing connections of the Collector nodes. |
Alternative to Collector Output Paths
Collector node outgoing paths can also be represented by a jump icon in the bottom-right corner of the Collector node, and in the top-left corner of the receiving node.
Curves can grow long and difficult to track in a complex flow, so hiding some of these lines this way can greatly reduce the visual disarray.
Please read the Settings Menu article for further details on enabling this feature.
![]()
Searching for Nodes
To find the nodes by their ID, use the search box in the menu strip.
Navigate to Flowchart → Open.
Load the preferred flow to the stage.
Enter the ID of the particular node in the search box and click the magnifier icon.
If there is a match, the node in demand will be positioned to the center of the stage area and its edit view will be opened automatically.
Debugging the Flow
The flow can be validated using the debug function. It checks the correctness and the progress of the flow.
Navigate to Flowchart → Open.
Create a new flow or load the preferred flow to the stage.
Click Debug to start the progress.

All warnings and error messages will be listed in the debug panel.
The debug panel messages contain the following details:
| Error level | The 'level' or severity of a debug message can be of error (text in dark gray) or warning (light colored text). |
| Error type | Please see the list of all error types in the table below. |
| Node or template name or ID | In case the debug message is triggered by a node or template, its name and ID is also displayed. |
| Name of attribute, announcement or connection | If a message is related to a specific attribute, announcement or connection of a node or template, its name is displayed here. |
| Quantifier | If a message is related to a quantity, the quantifiers are also displayed in the message. |
Warnings will not block publishing a flow – errors will. Please visit the Save & Publish article for further details on publishing flows.
The debugger is able to notice the corruptions in the existing XML templates, even if it is not a part of the current flow. An error message appears which describes the type, reason and the location of the error.
Note
It is not possible to guarantee that the debugger will spot every possible issue with every flow. Please perform thorough tests after every change – including live tests in the production environment – to confirm the flow behaves as it is intended.
List of Error Types
| Error Type | Error class |
|---|---|
| Too few nodes / templates of one node / template type | Node type specific (semantic error) |
| Too many nodes / templates of one node / template type | Node type specific (semantic error) |
| Node / template type XML is invalid | Node type specific (semantic error) |
| Node / template type XML is not well-formed | Node type specific (syntax error) |
| Too few entry points in the node / template type XML | Node type specific (syntax error) |
| Too many entry points in the node / template type XML | Node type specific (syntax error) |
| Too few bad selection entry points in the node / template type XML | Node type specific (syntax error) |
| Too many bad selection entry points in the node / template type XML | Node type specific (syntax error) |
| Too few incoming connections | Node instance specific |
| Too many incoming connections | Node instance specific |
| Too few outgoing connections | Node instance specific |
| Too many outgoing connections | Node instance specific |
| Missing specific connections | Node instance specific |
| Missing specific attributes | Node instance specific |
| Missing specific announcements | Node instance specific |
| Recursion | Node instance specific |
| Flow XML is invalid | Flow specific (semantic error) |
| Too few nodes in the flow | Flow specific (semantic error) |
| Too many nodes in the flow | Flow specific (semantic error) |
| Flow XML is not well-formed | Node instance specific |