How to Create Google Credentials
Creating Google application
Create your new Project and select it
Select Credentials -> Create credentials
Select OAuth client ID
Select Web application
Click on the Configure Consent Screen
- Select External and click on Create
Edit App registration
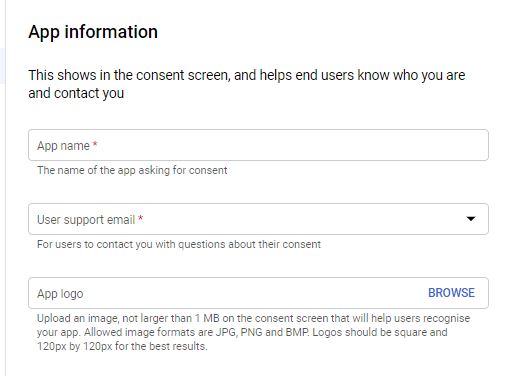
App Information
- App name: You give a name for your application
- Support email: You need to select an email address for it.
If you choose external Consent screen and do not have groups the only address you can choose is the main email address what you registered to the google developer. App logo: You can upload your own logo here
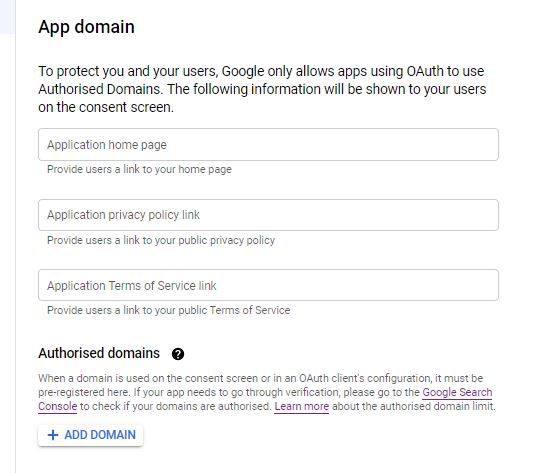
App Domain: You need to fill the Application home page and the Authorised domains
- Application home page: You need to use your main domain address with https://
Authorised domains: click on the '+ Add domain', and write down the main domain address without the https://.
Developer contact information: You need to give an email address. You can choose the main email address what you registered to the google developer.
Click Save & Continue
Scopes
- Add these scopes with 'add or remove scopes' button https://www.googleapis.com/auth/drive.metadata
- View and manage metadata of files in your Google Drive https://www.googleapis.com/auth/drive.metadata.readonly
- View metadata for files in your Google Drive https://www.googleapis.com/auth/calendar.readonly
- View your calendars https://www.googleapis.com/auth/calendar.events
- View and edit events on all your calendars https://www.googleapis.com/auth/spreadsheets
- See, edit, create, and delete your spreadsheets in Google Drive https://www.googleapis.com/auth/spreadsheets.readonly
- View your Google Spreadsheets
Test users
- You can add a test user email if you wish, but user cap prior to app verification is 100. You can click on save and continue
Summary
- You can see all of the app registration. If you wish some minor changes you can click on the Edit, or scroll down and click on the 'Back to Dashboard' button.
In the left menu click on Credentials -> + Create credentials
Select OAuth client ID
Select Web application
Add and Fill Authorized JavaScript origins with https://{yourdomain} - this is not just the main domain name, you can ctrl+c and ctrl+v your site.
Add and Fill authorized redirect URIs with https://{yourdomain}/public-api/google/auth/exchangeCodeForToken
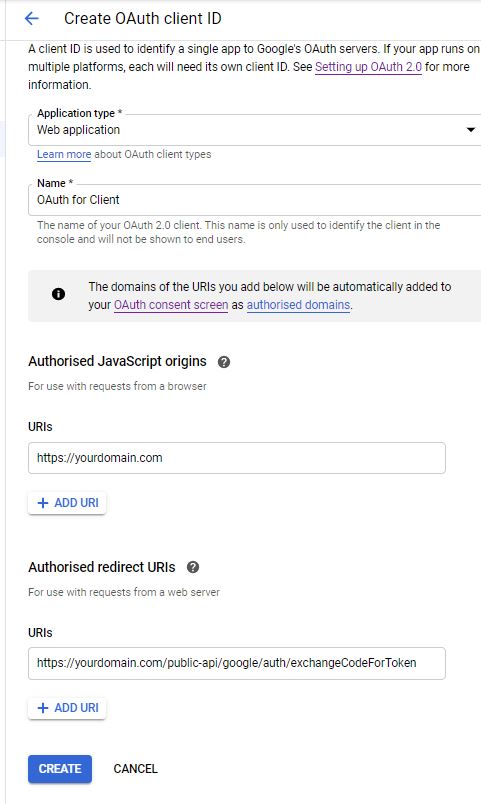
Click on the 'Create' button to make it.
Under Credentials -> Create credentials
Select API key
Choose Restrict Key - it will open your API key
You need to choose the Application restrictions -> HTTP referrers (website)
In the Website restriction, you need to click on the 'Add an item' button and add your domain name there
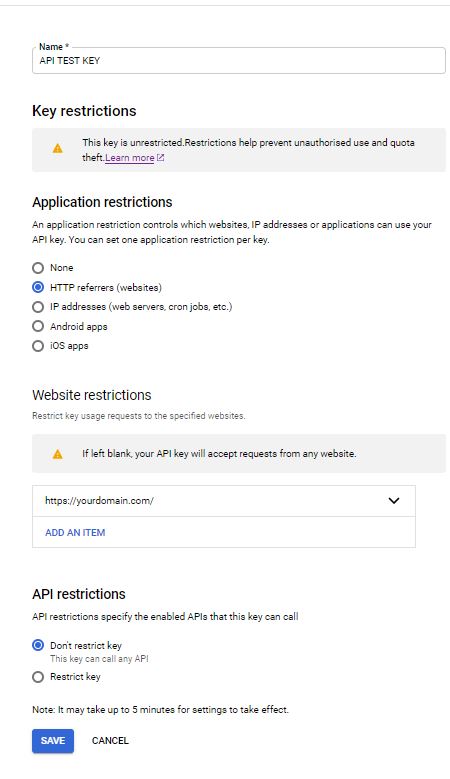
Click on the 'save' button to make sure your changes are saved
Also, you need to enable two API from the API Library. You can reach the API Library from the Navigation menu -> APIs & Services -> Library.
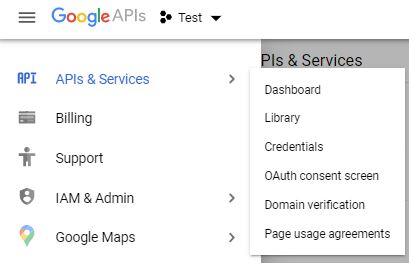
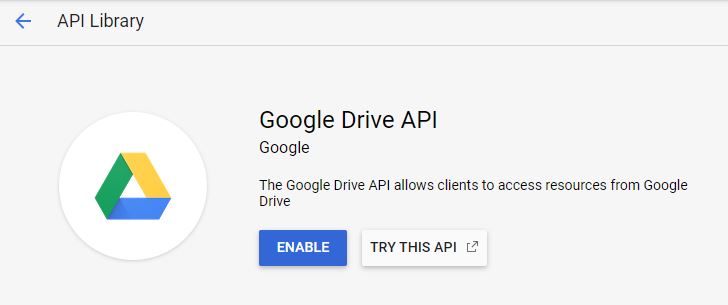
- You need to search for the Google Sheet API and the Google Drive API. Both of them needed to be enabled for the Spreadsheet. For Calendar integrations you will need to enable the Google Calendar API as well. When you enabled these API's you need to wait for a few minutes to get the API's work properly.

- Click on the enable button.
Set up your Google application
- You will need Superadmin rights in wallboard
- You need to go to the Administrator-> System settings
For Spreadsheets:
Select the created Oauth 2.0 Clients IDs credentials, and copy the "Client ID" and "Client secret"
Select the created credential and copy "Client ID" and "Client secret"

Select your created API Key and copy your API Key

Go to your Editor web site Administrator -> System settings search for Google API settings
- Google API Oauth2 client-id - the "Client ID" what you have copied from the Oauth 2.0 Client IDs credential
- Google API Oauth2 client-secret - the "Client secret" what you have copied from the Oauth 2.0 Client IDs credential
Google API key - the "API Key" what you have copied from the API keys

After you finished with it, save and click on the 'Restart application' button. The server will restart itself. It may need a few minutes to get started.

After you have finish, allow about five minutes for your Google Credentials to work properly.
Note: If you choose Internal, you may can have this:

How will the scopes be used?
We use it to sync the files and folders from your drive. We only sync folders that you have been choosen to sync, we don't touch or try to access any other files/folders. You can cancel the sync process any time and delete your data from our server permanently.
We use the files to show them inside contents, which only you/your tenant can publish to the public.