OnCall IVR Designer v7.11.2, part of OnCall IVR Suite v3.3.x
Announcements
The announcement management functions are available only for users who have the appropriate user rights.
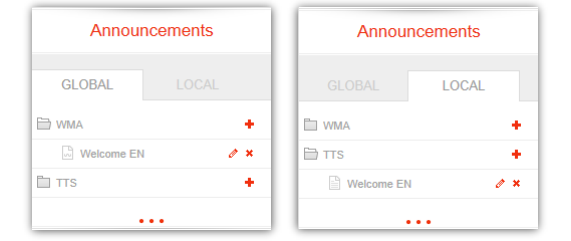
Announcements are grouped by their usage scope: global or local. Local items can be used only in the flow in which they have been added, but global announcements can be used in every flow. Announcements are also grouped by their type: TTS or WMA. A TTS announcement is simple text, whereas WMA is binary sound file. This grouping results 4 sections in the Announcements palette, visualized as two tabs and two folders in each tab:
- Global
- WMA
- TTS
- Local
- WMA
- TTS
Caution
All changes made to announcements will be applied permanently only after saving the flow. Closing the flow without saving will result in the loss of all changes made to announcements.

Adding a new Announcement
To add a new announcement with the desired scope and type, select the scope tab (e.g., Global) and click the + icon next to the announcement type (e.g., WMA). Proceed to fill in the input fields in the Add announcement dialog.
WMA
For WMA announcements, you can upload a .wma sound file. After clicking the upload button, browse for the file to be uploaded, and the Upload WMA field will be automatically filled with the file name.
Note
The file name of the uploaded .wma file always gets a timestamp.
TTS
For TTS announcements, you can specify text in the Content field, which the speech engine of the IVR system will read out. The Content field supports SSML tags, providing control over the speech engine's behavior.
To insert variable values into the text, use the '$$v1$$', '$$v2$$', '$$vN$$' notation based on the Number of variables value. Set the Number of variables field to the desired count.
Once everything is configured, click OK. After a successful upload, the new announcement will appear in the list.
An example of a TTS announcement with SSML tags and variables is shown below:
Thank you for calling. Your account type id $$v1$$.
Your account balance is <say-as interpret-as="cardinal">$$v2$$</say-as> dollars.
Your last payment was on <say-as interpret-as="date" format="yyyymmdd">$$v3$$</say-as>.
Note
The voice and language of the speech engine can be set on the Start node of the flow.
Before selecting a voice and language, ensure that the chosen options are available on the IVR system's speech engine.
Editing an existing Announcement
Editing can be done in a manner similar to adding announcements. Click the Edit icon next to the announcement’s name. In the Edit announcement dialog, you can modify all attributes except for the name of the announcement. Additionally, you can update the .wma file if needed. Once the editing is complete, click OK.
Deleting an Announcement
To delete an announcement, click the Delete icon next to the announcement’s name, and then confirm by clicking OK in the displayed Delete announcement confirmation dialog.
Using Announcements in the Flow
Announcements can be assigned to several nodes and templates. To do this, drag an item from the announcement palette and drop to the speaker icon which can be found in every announcement capable node. If there is no announcement attached to the node or template, the speaker icon is grey, else the icon is red.
Announcements can be assigned to several nodes and templates. To do this, drag an item from the announcement palette and drop it onto the speaker icon, which can be found in every announcement-capable node. If there is no announcement attached to the node or template, the speaker icon is grey; otherwise, the icon is red.
If you hold the mouse pointer over a red speaker icon, its background turns to red, and a hint appears, which shows the content of the announcement. To play the sound of a WMA announcement, click the speaker icon once. If no file has been uploaded to a WMA announcement, the hint warns that there is no sound uploaded.
To set variables for a TTS announcement, click the speaker icon once. The Set TTS announcement parameters dialog will appear, where you can set the variables to insert into the text by replacing the '$$v1$$', '$$v2$$', '$$vN$$' notations.