Installing CE Designer Tools
Contact Expert v6.1 for Skype for Business Server
Installing Contact Expert Designer Tools
Important
Before starting the installation of Contact Expert Script Designer, please make sure all Contact Expert Prerequisites are already installed on the target computer.
This chapter describes the installation steps of the legacy component Script Designer (also known as Teleproxy Designer or Campaign Designer). We recommend you to use Cloud Scripting instead, as the legacy solution is out of support.
Please note that a minimum screen resolution of 1366 x 768 is needed on the PC the dedicated Script Designer tool will be used on.
Follow these steps to install Contact Expert Designer Tools
Log on to CE Administrator PC with local administrator privileges.
Launch "CE\CE_Teleproxy\setup.exe" from the Contact Expert installation media.
Accept the license agreement, enter a user name and a company name and select the "Anyone who uses this computer" option.
Accept the default installation path (C:\Geomant\CE) and accept the list of components selected by default.
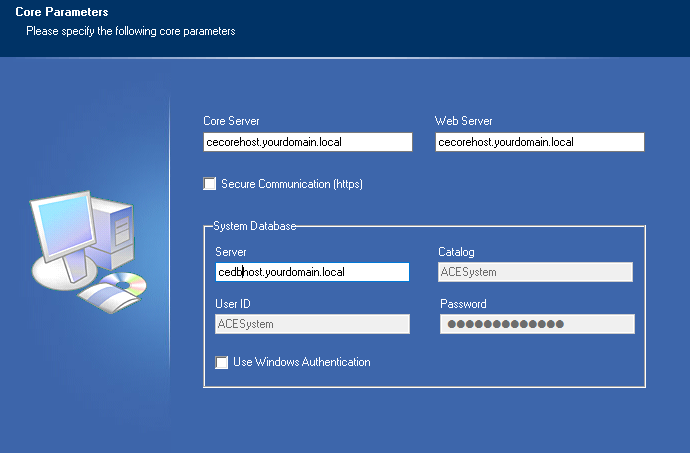
Specify the installation parameters on the Core Parameters screen as per the instructions below, then click Next:
Core Server: enter the FQDN of the CE Core Host here.
Web Server: enter the FQDN of the CE Core Host here.
System Database:
- Server: enter the FQDN of the CE Database Host here.
- User ID: this field is not editable.
- Password: this field is not editable.
- Catalog: this field is not editable.
- Use Windows Authentication: leave unchecked.
Secure Communication (HTTPS): leave unchecked.
Click Next at the next screen and wait for the install wizard to finish.
Using Script Designer
Creating Agent Scripts (Scenarios)
To create and assign an agent script to the previously created campaign
Log on to CE Administrator PC with local administrator privileges.
Find and open the CE Tools shortcut on the desktop and run CE Script Designer with administrator privileges in order to assign a script to the campaign already created using the Administrator interface.
Open a campaign being in Design state.
Create a simple script for the campaign and save it.
- If you do not wish to create one from the beginning, use the "Import campaign from cabinet file" button on the toolbar to import a demo script from the following location: "CE\CE_Scripts\parking.cab" from the Contact Expert installation media.

Checking Campaign Availability
To check the availability of the campaign and recorder endpoints
Launch Internet Explorer.
Navigate to the Contact Expert Administrator interface: https://[CE Core Host FQDN]/CEPortal and log in using the default administrator credentials.***
Change the state of the campaign to Running as explained in the Designing Queues & Campaigns#Campaign States chapter.
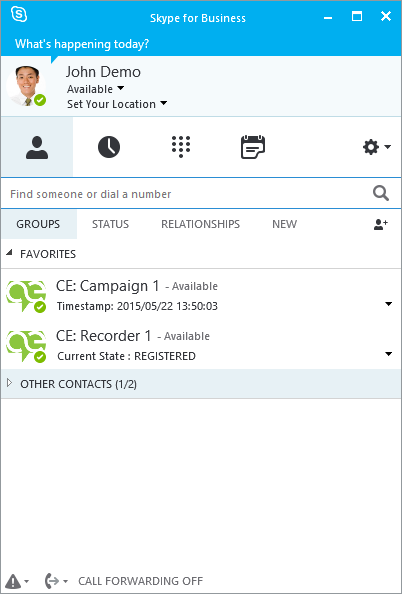
Log on to the CE Agent (Operator) PC and launch the Skype for Business client.
Search for the Skype for Business contact records of both the recorder and the campaign endpoints. Both of them should be showing up and in an Available state (green presence status).
 {.image-right width="175"}